Categories
translation

I’ve re-translated “Hyōhaku (漂舶)”.

   I’ve finished the re-translation of “Hyōhaku (漂舶)”, so, I’ve released my second edition. I added some phrases forgotten to translate, again (^^;). I wonder you can find any improvements of my English about this edition.

   At the first edition of the story, I had very troubles with Rokuta(六太)’s way of speaking. He is an ordinary bad brat, so his language is bad. For a non-native English speaker, to translate dialect or bad language is more difficult than to translate standard language. At this time, I had troubles again. Sigh.

   In my re-translation, I use Prolonged Sound Mark for a long vowel when I romanize some nouns. For example, ō, ū.

Categories
everyday life

Shigeyama Sensaku IV (四世茂山千作) passed away.

   Shigeyama Sensaku IV (四世茂山千作) passed away at the age of 93. He is one of the greatest Kyōgen actors. Age 93, it’s enough to pass away, but, still very sad. I loved his Kyōgen very much. 合掌.

Categories
private remark

My thought of gods.#4

   I found an interesting article on the Internet. It is Who/what created the world?. On it, Japan has 1,766 votes, 33% of which has polled “God created the world” and 67% of which has polled “Big Bang created the world”.

   As soon as I see it, I wonder who is “God”. For people of monotheistic religions, God is the god maybe 100%. But for us? When Japanese poll a vote, how many percents of us imagines “God” monotheists expect? Even if we read the word “God”, in our brain the word is automatically translated into “神”. When it happens, we recognize “God” as “神”. And “神” is never the One God.

   Actually, for me, “神 created the world” is consistent with “Big Bang created the world”. Pay attention to the word “神”. It’s never the God. The control room of Hayabusa had an Ofuda of Chūka shrine(中和神社) and others. This is a very famous episode. The Ofuda of Chūka shrine which Dr. Kawaguchi(川口淳一郎) got from the shrine and he made a play on words linking 中和器(chūwa-ki = neutralizer) and 中和神社(Chūka-jinja). They have same kanji characters though their pronunciations are different.

   He was not kidding by his act. We have the saying “Do your best and leave the rest to Providence (人事を尽くして天命を待つ)”. He did his best and there was not anything else he could. So, he did make such a play and did pray, I think. Since early times, Japanese have accepted a lot kinds of religions, but we still keep a primitive faith to Nature(自然) in our mind. When we use the word 自然, it also includes us, human-beings.

   From the Meiji Restoration(1868) to the end of World War II(1945), Japanese government used Shrines (神社) as one of the tools of state administration, so shrines carry political implications now. But originally, shrines have no relationship with the government. They have long history. In some periods of the long history, they might have some relationship with the powers of the day, but they originated in our primitive faith to Nature.

   We have a god everywhere, kitchen oven, bath, lavatory, etc. By the way, bath and lavatory are usually separated in Japan still now.

   When Japanese are asked his/her religion, he/she often answers he/she has no religion or he/she is an atheist. You should not blindly accept it. It’s NOT true. It means he/she is not a Christian, not a Muslim, and so on. We, most of Japanese, even today, have our old gods in our mind. It is our religion.

Categories
everyday life

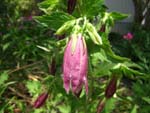
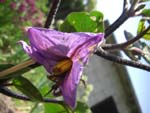
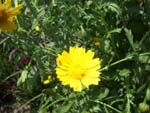
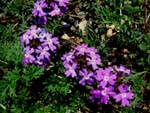
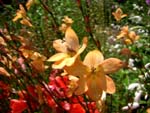
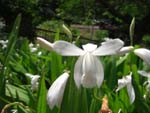
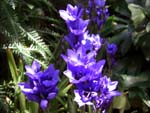
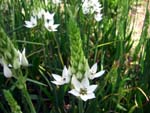
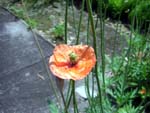
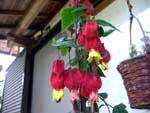
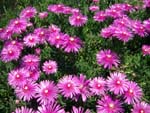
Today’s flowers in my garden and in my house.

   Now, in my garden many kinds of flowers are in bloom. I’ll show you their photos.

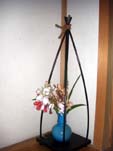
   And, one of my family loves Ikebana, who picks the flowers from the garden and makes flower arrangements by them in the house. Please take a look!!
 

CIMG3693 CIMG3692 CIMG3691
CIMG3690 CIMG3689 CIMG3688
CIMG3687 CIMG3686 CIMG3685
オーニソガラム・シルソイデス CIMG3681 ムラサキカタバミ
CIMG3677 CIMG3675 CIMG3674
CIMG3700 CIMG3699 CIMG3698
CIMG3664 CIMG3694 CIMG3696 CIMG3697
Categories
Uncategorized

Updating to PHP5.4.15.

Update information      Edit(Aug.3)

   At May-08 22:51:34UTC, they released PHP5.4.15. However, on May-09, the news read:

   “Seriously: PHP 5.4.15 and PHP 5.3.25 really were released!”

  • We weren’t trying to pull an April Fool’s Day joke in May. A temporary glitch caused the latest distributions of PHP to not properly propagate to the mirror servers. This has been fixed at the root level, and it’s now being distributed to all of the mirrors. We’ll take some bacon to go with the egg on our faces, please!
  • If you continue to experience issues with downloading these versions after 21:00 UTC on 9 May, 2013, please drop us a line at php-mirrors@lists.php.net, telling us from which mirror you’re trying to download, and we’ll get it resolved.
  • We apologize for the delays and confusion this may have caused, and thank you for using PHP.

   They have had something wrong, haven’t they? Though, I don’t know about it, I’m more interested in ‘We’ll take some bacon to go with the egg on our faces, please!’.
   What does the sentence mean exactly? Yes, I can infer the meaning of the sentence from context, though. What is some bacon in the sentence really? This is very difficult for me who is NOT an everyday-English-speaker. Someone, re-write it by using less idiomatic, please, please, please!!!

   By the way, I downloaded a Thread Safe version php-5.4.15-Win32-VC9-x86.zip for my server (WindowsXP SP3(x86)).

   Acoording to the ChangeLog, it has 7 bug fixes, and upgrades libmagic to 5.14. They say “All users of PHP are encouraged to upgrade to PHP 5.4.14.”.

   As php5apache2_4.dll included in the official PHP binary 5.4.10+, I extracted the zip archive and replaced all PHP5.4.13 files with all PHP5.4.14 files except my php.ini. Then, I restarted my Apache. That’s it.

   If you need how to configure PHP5.4, please see the post on my Japanese blog. Of course, it is only in Japanese and for a mbstrings user, but I think the information gives some help for you.

Edit(Aug.3):
   If you need how to configure PHP5.5, please see “To create a Wamp-like Web Server in Windows7-#2“.

Categories
translation

Another information about ~-#4.

   I added three new translations to “The translation of Juuni kokuki newsletter by Shinchōsha“.

   They show us the two illustrations from “A Thousand Miles of Wind, The Sky at Dawn #1, #2 (風の万里 黎明の空)”.

Categories
Uncategorized

How to create a Virtual PC in Windows7 and run CentOS6.4 on it.

同一記事の日本語版
   I have a Let’snote, a Panasonic product and a kind of Toughbook, as my mobile PC. Though I configured the dual-boot system of Windows7 and CentOS6, I destroyed all data on the PC before I sent it for repair. When I got it again, I decided to create a Virtual PC and run CentOS6.4 on it. This post is my remainders and I think it gives some convenient for you guys. (^o^)

   First, I create a Virtual PC in Windows7 Home Premium on CF-J10TYAHR.

  1. Download the latest VMware Player for Windows 32-bit and 64-bit(Current:ver.5.0.2) from Download VMware Player.
  2. Install VMware Player~.exe by its default.

   Second, I install CentOS6.4 on the Virtual PC.

  1. Download the latest CentOS-x.x-i386-bin-DVD1.iso(Current:ver.6.4) from CentOS Mirrors. I don’t need CentOS-x.x-i386-bin-DVD2.iso because I install it as a non-customized Desktop.
  2. Run the VMware Player from the Desktop shortcut.
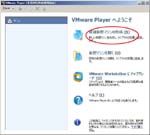
  3. Select “Create a New Virtual Machine”. (Fig.01)
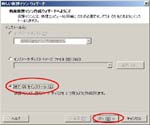
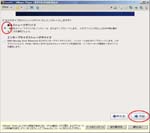
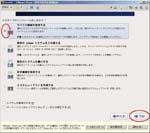
  4. Select “I will install the operating system later.”. (Fig.02)
    Because I cannot make any customizations if I select “Installer disc image file (iso):”.
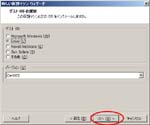
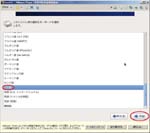
  5. Select “Linux (L)” and “CentOS”. (Fig.03)
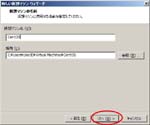
  6. Enter a distinguishable virtual machine name because I might create other virtual machines later (^^;), and select the location where I want to install the Virtual Machine. (Fig.04)
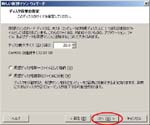
  7. Leave the default and click “Next”. (Fig.05)
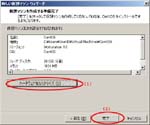
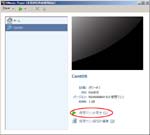
  8. Click “Customize Hardware…”. (Fig.06-(1))
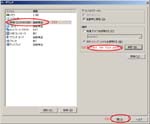
  9. Select the ISO file like CentOS-x.x-i386-bin-DVD1.iso and click “Close”. (Fig.07-(1)(2)(3))
  10. Click “Finish”. (Fig.06-(2))
  11. Play the Virtual Machine to install CentOS. (Fig.08)
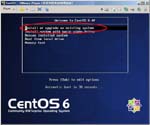
  12. Select “Install or upgrade an existing system”. (Fig.09)
    At these procedures I cannot use the mouse for the guest OS, so I make Shortcut Memo for me:

    • [Ctrl+G] Go into the guest OS.
    • [Ctrl+Alt] Return to the host OS.
  13. Select “Skip”. (Fig.10)
  14. Click “Next”. (Fig.11)
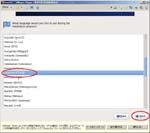
  15. Select my language and click “Next”. (Fig.12)
  16. Select my keyboard and click “Next”. (Fig.13)
  17. Select “Basic Storage Devices” and click “Next”. (Fig.14)
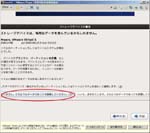
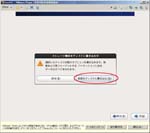
  18. Click “Yes, discard any data”. (Fig.15)
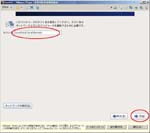
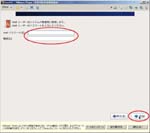
  19. Enter a unique host name on my LAN and click “Next”. (Fig.16)
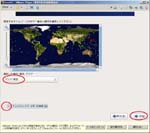
  20. Select my time zone, unchecked “System clock uses UTC” and click “Next”. (Fig.17)
  21. Set a password for the root account, then click “Next”. (Fig.18)
  22. Select “Use All Space” and click “Next”. (Fig.19)
  23. Click “Write changes to disk”. (Fig.20)
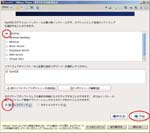
  24. Checked “Desktop” and “Customize later” and Click “Next”. (Fig.21)
  25. Click “Reboot”. (Fig.22)
  26. Click “Forward”. (Fig.23)
  27. Leave the default and click “Forward”. (Fig.24)
  28. Set Username, Full Name and Password for the User account and click “Forward”. (Fig.25)
  29. Leave the default and click “Forward”. (Fig.26)
  30. Click “OK”. (Fig.27)
  31. Leave the default and click “Finish”. (Fig.28)
  32. Click the UserName. (Fig.29)
  33. Enter the Password you set. (Fig.30)
  34. Click “Install Tools”. (Fig.31)
  35. Close the Window. (Fig.32)
  36. Open a terminal window. Log on as root.
    [centos@CentOS ~]$ su –
    Password: <<—– Enter root account password

    I need Perl to install “VMware Tools”, so I check it.
    [root@CentOS ~]# yum list installed | grep perl
    perl.i686   4:5.10.1-129.el6 @anaconda-CentOS-201303020136.i386/6.4 <<—– Already installed
    …………

    I need to know the Virtual CD-ROM device is already mounted.
    [root@CentOS ~]# mount
    …………
    /dev/sr0 on /media/VMware Tools type iso9660 (ro,nosuid,nodev, …) <<—– Already mounted

    I check the contents of the CD to know the exact name of “VMware Tools” file.
    [root@CentOS ~]# ls /media/”VMware Tools”
    VMwareTools-9.2.3-1031360.tar.gz manifest.txt

    [root@CentOS ~]# cd /tmp <<—– move to the tmp directory

    [root@CentOS tmp]# tar zxpf /media/”VMware Tools”/VMwareTools-9.2.3-1031360.tar.gz

    [root@CentOS tmp]# ls
    …………
    vmware-tools-distrib
    …………

    [root@CentOS tmp]# ls vmware-tools-distrib
    FILES INSTALL bin doc etc installer lib vmware-install.pl

    [root@CentOS tmp]# cd vmware-tools-distrib
    [root@CentOS vmware-tools-distrib]# ./vmware-install.pl

    「The messages from vmware-install.pl」
    Creating a new VMware Tools installer database using the tar4 format.

    Installing VMware Tools.

    In which directory do you want to install the binary files? [/usr/bin]

    What is the directory that contains the init directories (rc0.d/ to rc6.d/)? [/etc/rc.d]

    What is the directory that contains the init scripts? [/etc/rc.d/init.d]

    In which directory do you want to install the daemon files? [/usr/sbin]

    In which directory do you want to install the library files? [/usr/lib/vmware-tools]

    The path “/usr/lib/vmware-tools” does not exist currently. This program is going to create it, including needed parent directories. Is this what you want? [yes]

    In which directory do you want to install the documentation files? [/usr/share/doc/vmware-tools]

    The path “/usr/share/doc/vmware-tools” does not exist currently. This program is going to create it, including needed parent directories. Is this what you want? [yes]

    The installation of VMware Tools 9.2.3 build-1031360 for Linux completed successfully. You can decide to remove this software from your system at any time by invoking the following command: “/usr/bin/vmware-uninstall-tools.pl”.

    Before running VMware Tools for the first time, you need to configure it by invoking the following command: “/usr/bin/vmware-config-tools.pl”. Do you want this program to invoke the command for you now? [yes]

    Initializing…

    /usr/bin/xrandr: Failed to get size of gamma for output default

    Making sure services for VMware Tools are stopped.

    Stopping Thinprint services in the virtual machine:
    Stopping Virtual Printing daemon: done
    Stopping VMware Tools services in the virtual machine:
    Guest operating system daemon: [ OK ]
    Unmounting HGFS shares: [ OK ]
    Guest filesystem driver: [ OK ]

    The VMware FileSystem Sync Driver (vmsync) allows external third-party backup software that is integrated with vSphere to create backups of the virtual machine. Do you wish to enable this feature? [no]

    Found a compatible pre-built module for vmci. Installing it…

    Found a compatible pre-built module for vsock. Installing it…

    The module vmxnet3 has already been installed on this system by another installer or package and will not be modified by this installer. Use the flag
    –clobber-kernel-modules=vmxnet3 to override.

    The module pvscsi has already been installed on this system by another installer or package and will not be modified by this installer. Use the flag
    –clobber-kernel-modules=pvscsi to override.

    The module vmmemctl has already been installed on this system by another installer or package and will not be modified by this installer. Use the flag
    –clobber-kernel-modules=vmmemctl to override.

    The VMware Host-Guest Filesystem allows for shared folders between the host OS and the guest OS in a Fusion or Workstation virtual environment. Do you wish to enable this feature? [yes]
    no <<—–I change only here.

    Found a compatible pre-built module for vmhgfs. Installing it…

    Found a compatible pre-built module for vmxnet. Installing it…

    The vmblock enables dragging or copying files between host and guest in a Fusion or Workstation virtual environment. Do you wish to enable this feature? [yes]

    !!! [EXPERIMENTAL] !!!
    VMware automatic kernel modules enables automatic building and installation of VMware kernel modules at boot that are not already present. By selecting yes, you will be enabling this experimental feature. You can always disable this feature by re-running vmware-config-tools.pl.

    Would you like to enable VMware automatic kernel modules? [no]

    Thinprint provides driver-free printing. Do you wish to enable this feature? [yes]

    Disabling timer-based audio scheduling in pulseaudio.

    Detected X server version 1.13.0

    Distribution provided drivers for Xorg X server are used.

    Skipping X configuration because X drivers are not included.

    Creating a new initrd boot image for the kernel.
    Starting Virtual Printing daemon: done
    Checking acpi hot plug [ OK ]
    Starting VMware Tools services in the virtual machine:
    Switching to guest configuration: [ OK ]
    Guest vmxnet fast network device: [ OK ]
    VM communication interface: [ OK ]
    VM communication interface socket family: [ OK ]
    Guest filesystem driver: [ OK ]
    Blocking file system: [ OK ]
    Guest operating system daemon: [ OK ]
    The configuration of VMware Tools 9.2.3 build-1031360 for Linux for this running kernel completed successfully.

    You must restart your X session before any mouse or graphics changes take effect.

    You can now run VMware Tools by invoking “/usr/bin/vmware-toolbox-cmd” from the command line.

    To enable advanced X features (e.g., guest resolution fit, drag and drop, and file and text copy/paste), you will need to do one (or more) of the following:
    1. Manually start /usr/bin/vmware-user
    2. Log out and log back into your desktop session; and,
    3. Restart your X session.

    To use the vmxnet driver, restart networking using the following commands:
    /etc/init.d/network stop
    rmmod pcnet32
    rmmod vmxnet
    modprobe vmxnet
    /etc/init.d/network start

    Enjoy,

    –the VMware team
    「The end of the messages」

    [root@CentOS ~]# exit

    Close the terminal windows.
  37. Reboot CentOS.
  38. Now, I can use CentOS6.4 on my Let’snote. Some configurations I need haven’t finished yet, though.
(Fig.01)Fig.01(Fig.02)Fig.02(Fig.03)Fig.03(Fig.04)Fig.04(Fig.05)Fig.05(Fig.06)Fig.06(Fig.07)Fig.07(Fig.08)Fig.08(Fig.09)Fig.09(Fig.10)Fig.10(Fig.11)Fig.11(Fig.12)Fig.12(Fig.13)Fig.13(Fig.14)Fig.14(Fig.15)Fig.15(Fig.16)Fig.16(Fig.17)Fig.17(Fig.18)Fig.18(Fig.19)Fig.19(Fig.20)Fig.20(Fig.21)Fig.21(Fig.22)Fig.22(Fig.23)Fig.23(Fig.24)Fig.24(Fig.25)Fig.25(Fig.26)Fig.26(Fig.27)Fig.27(Fig.28)Fig.28(Fig.29)Fig.29(Fig.30)Fig.30(Fig.31)Fig.31(Fig.32)Fig.32