I thought I’d done it, but actualy I hadn’t. I talk about what. It was “Removing OCSP URLs from certificates“. I read the article and thought I would have some time until its deadline. So, I just forgot it.
And so, I didn’t notice it until this month. It shows how slack I’m being on taking care of my server recently.
I quickly removed OCSP stapling with this Apache update. 💦
The laptop mentioned previous article successfully became 24H2. The touchpad was risen because the battery was swollen, so I couldn’t use it. This time, I replaced the battery and adjusted the position of the touchpad. So I can use it now. However, suddenly the mouse cursor stops working, and I have a BSoD. The stop code is DPC_WATCHDOG_VIOLATION. The same symptoms occur with a wired USB mouse, so I think it might be related to the driver. Though I tried dism and sfc, there were no problems.
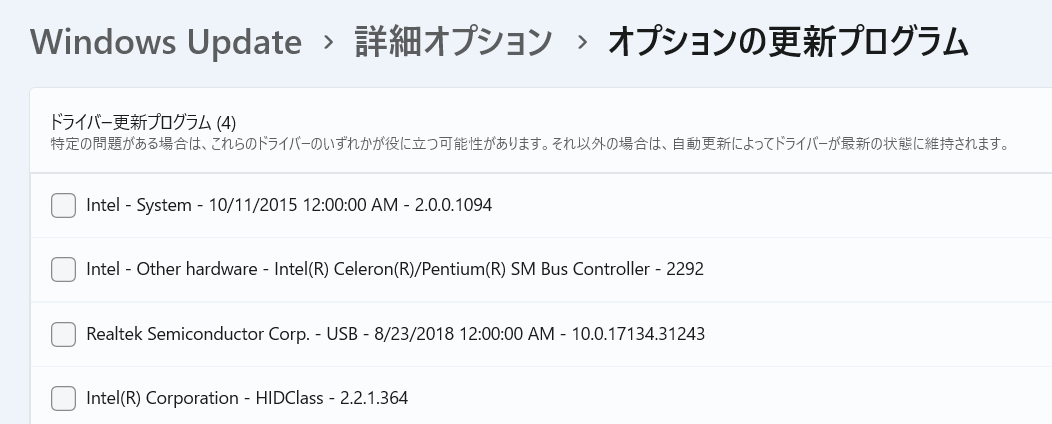
When I look in “Settings>>Windows Update>>Advanced Options>>Optional Updates”, I find the four updates in the image below. One of them is HID-related, and even after reading the program descriptions, I’m not sure if they are related. But I install all four anyway.
Since then I haven’t experienced any BSoDs. It means the result is certainly ok?
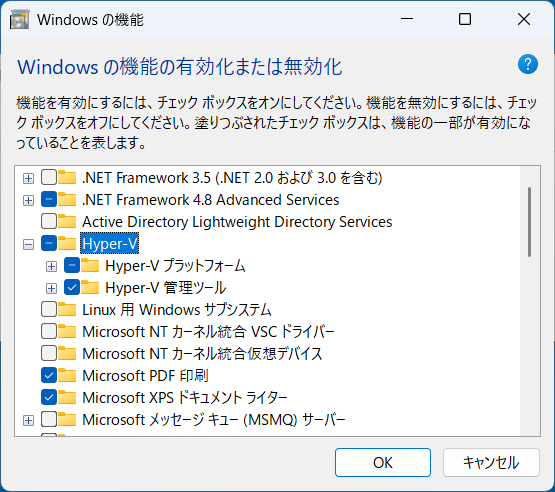
Now, enable Hyper-V and run the virtual machine.
This laptop has Windows 11 PRO, so I can use Hyper-V if enabled. Go to “Control Panel >> Programs and Features >> Turn Windows features on or off”, check Hyper-V and click OK. Then follow the instructions on the screen and restart the laptop.
After rebooting, launch Hyper-V Manager and create a virtual machine. Go to “Right Pane >> Quick Create >> Virtual Machine” and made some decisions. I was planning to install the 32-bit version of Windows 7, so I chose the first generation.
Also I left the network configuration as not connected.
In the installation options, I specified the ISO file. I had to search all over for this ISO download. Windows 7 is no longer supported, so I can’t download the ISO from the Microsoft site, and I couldn’t get it from the archive.org link either.
I started it up and was surprised. The mouse cursor moves reversed up and down, though left and right are normal. On the internet I found, “if there are any disabled services in the list of integrated services, you can fix it by enabling them all”. But that didn’t work. I tried the method of using vmguest.iso from “Mouse vertical movement is reversed in Hyper-V for older OS’s” and it worked. Very impressed.
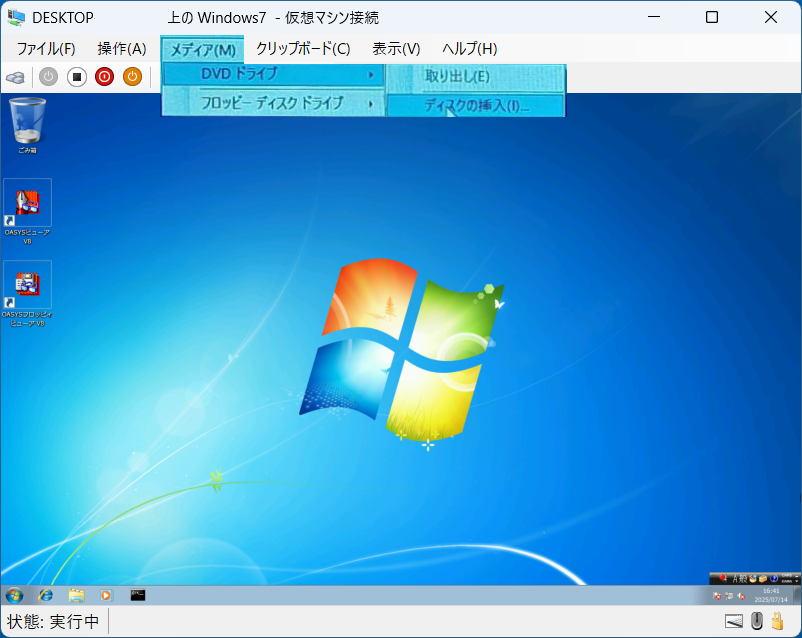
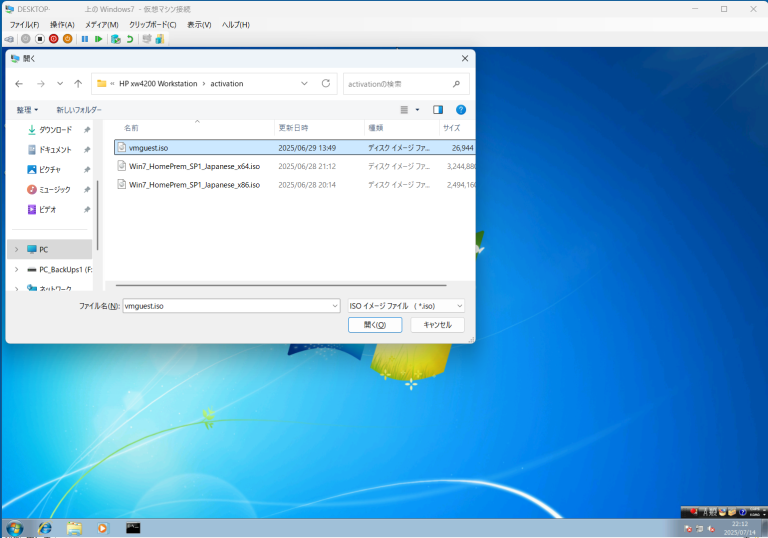
When I installed vmguest.iso, the article said to install it from the “Virtual Machine Connection” Action menu, but in the media menu there was a “DVD Drive” option, from which I could select the ISO file on the external USB hard disk connected to the host OS. At the time, this hard disk was not visible from Windows 7, but that didn’t matter.
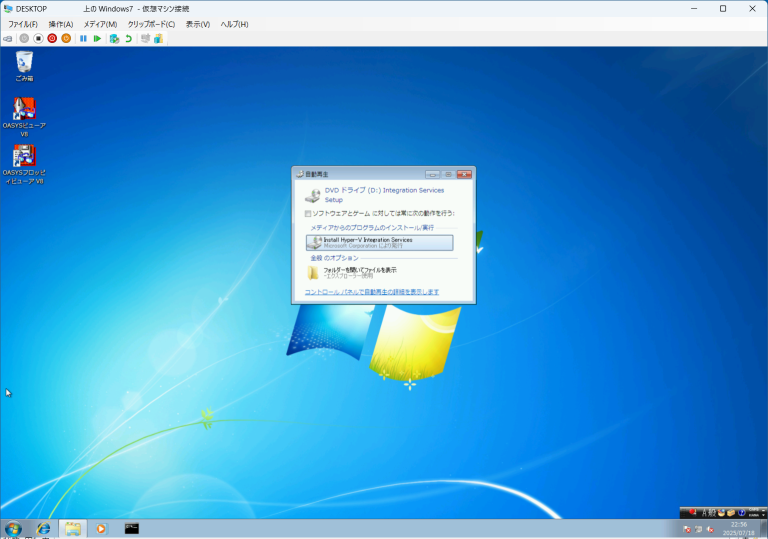
Opening the ISO file, an autoplay window will appear as shown below, so install from here.
After the installation completes, reboot the guest OS, Windows 7.
Some trouble activating Windows 7.
Now a Windows 7 virtual machine on Hyper-V. But if I use this machine forever, I have to activate Windows 7 on it. Otherwise I’ll often have problems with it not working……That’s in trouble. I originally chose not to connect in the network configuration on the guest OS, so I was going to use Microsoft phone authentication, but I ran into a problem before that.
I had error code 0xC004F061. I was trying to do it with the Windows 7 key I used on the server a long time ago.
Thinking about the key, I think the Windows 7 I used on the server was an update from Windows XP. Now I don’t have Windows XP anymore. Obviously the Windows 7 installed from the downloaded ISO is clean install. Mm, I’m in trouble.
Open the Windows 7 Registry Editor and change the value of MediaBootInstall in the right pane of HKEY_LOCAL_MACHINE/Software/Microsoft/Windows/CurrentVersion/Setup/OOBE to 0. Close the Registry Editor.
If this value is 0, it will be judged as an upgrade installation.
Run Windows 7 cmd.exe as administrator. Type slmgr /rearm and press the Enter key. Reboot Windows 7.
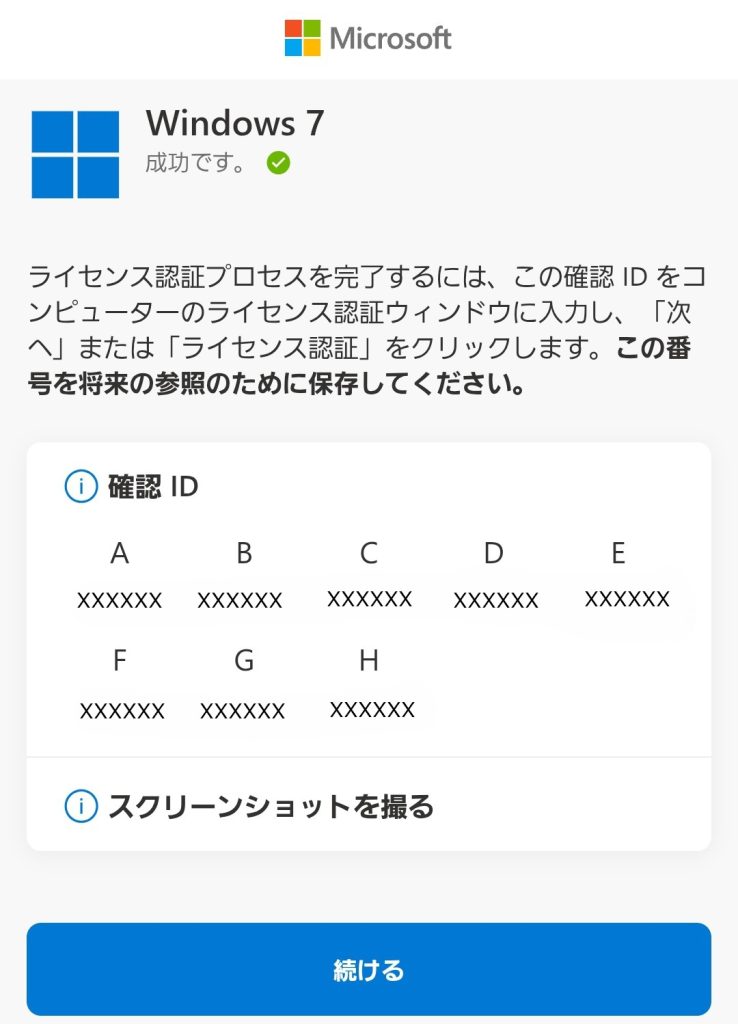
After rebooting, proceed to activation from “Computer” property. I call 0120-801-734 from my smartphone and hear an announcement. I follow the instructions and receive a link via SMS. Connect to the link and enter the displayed confirmation ID into Windows 7, and activation completed successfully. Phew.
I had a cheap laptop from Amazon and had used it to watch streaming programs on the AQUOS TV in my living room. I suddenly decided to upgrade it from Windows 10 PRO 22H2 to Windows 11 PRO 24H2.
Honestly, I had been thinking of throwing it away, and I had it waiting to go to the trash. But I had to delete the data and the battery was swollen, so I kept putting it off. Several days ago, I replaced the battery in my Dell Inspiron 5570. So, I was interested in the Amazon laptop and opened it. As expected I got the battery swollen. I looked for a compatible battery among net stores, and found one. So I decided to upgrade it. If it would work, I thougt to order the battery.
I thought I’d try it out and practice Hyper-V. Actually, I have some old apps that I want to run on Windows 7, so I want to try them out.
This cheap laptop is fine with the TPM 2.0, but the processor (Intel® Celeron® Processor J3160) does not match the requirements, so I can’t upgrade it in normal way. I upgraded using the article “少し変わった!Windows 11 Version 24H2を非互換PCにインストールする方法” as a reference. I downloaded CPU-Z and checked, and fortunately, I found that the laptop CPU supported SSE4.2 instructions.
The upgrade itself, which I performed under the instruction to use setupprep.exe /product server instead of the requirement bypass setup.exe /product server, went well without any problems. However, the battery I ordered didn’t arrive even after the scheduled date. That drove me crazy. The battery arrived, I replaced it, and finally I could move on to the next task.
By the way, my town office took the swollen lithium-ion battery. When I checked quite a while ago, the town office didn’t get it, but this time it was fine. Things changes everyday.
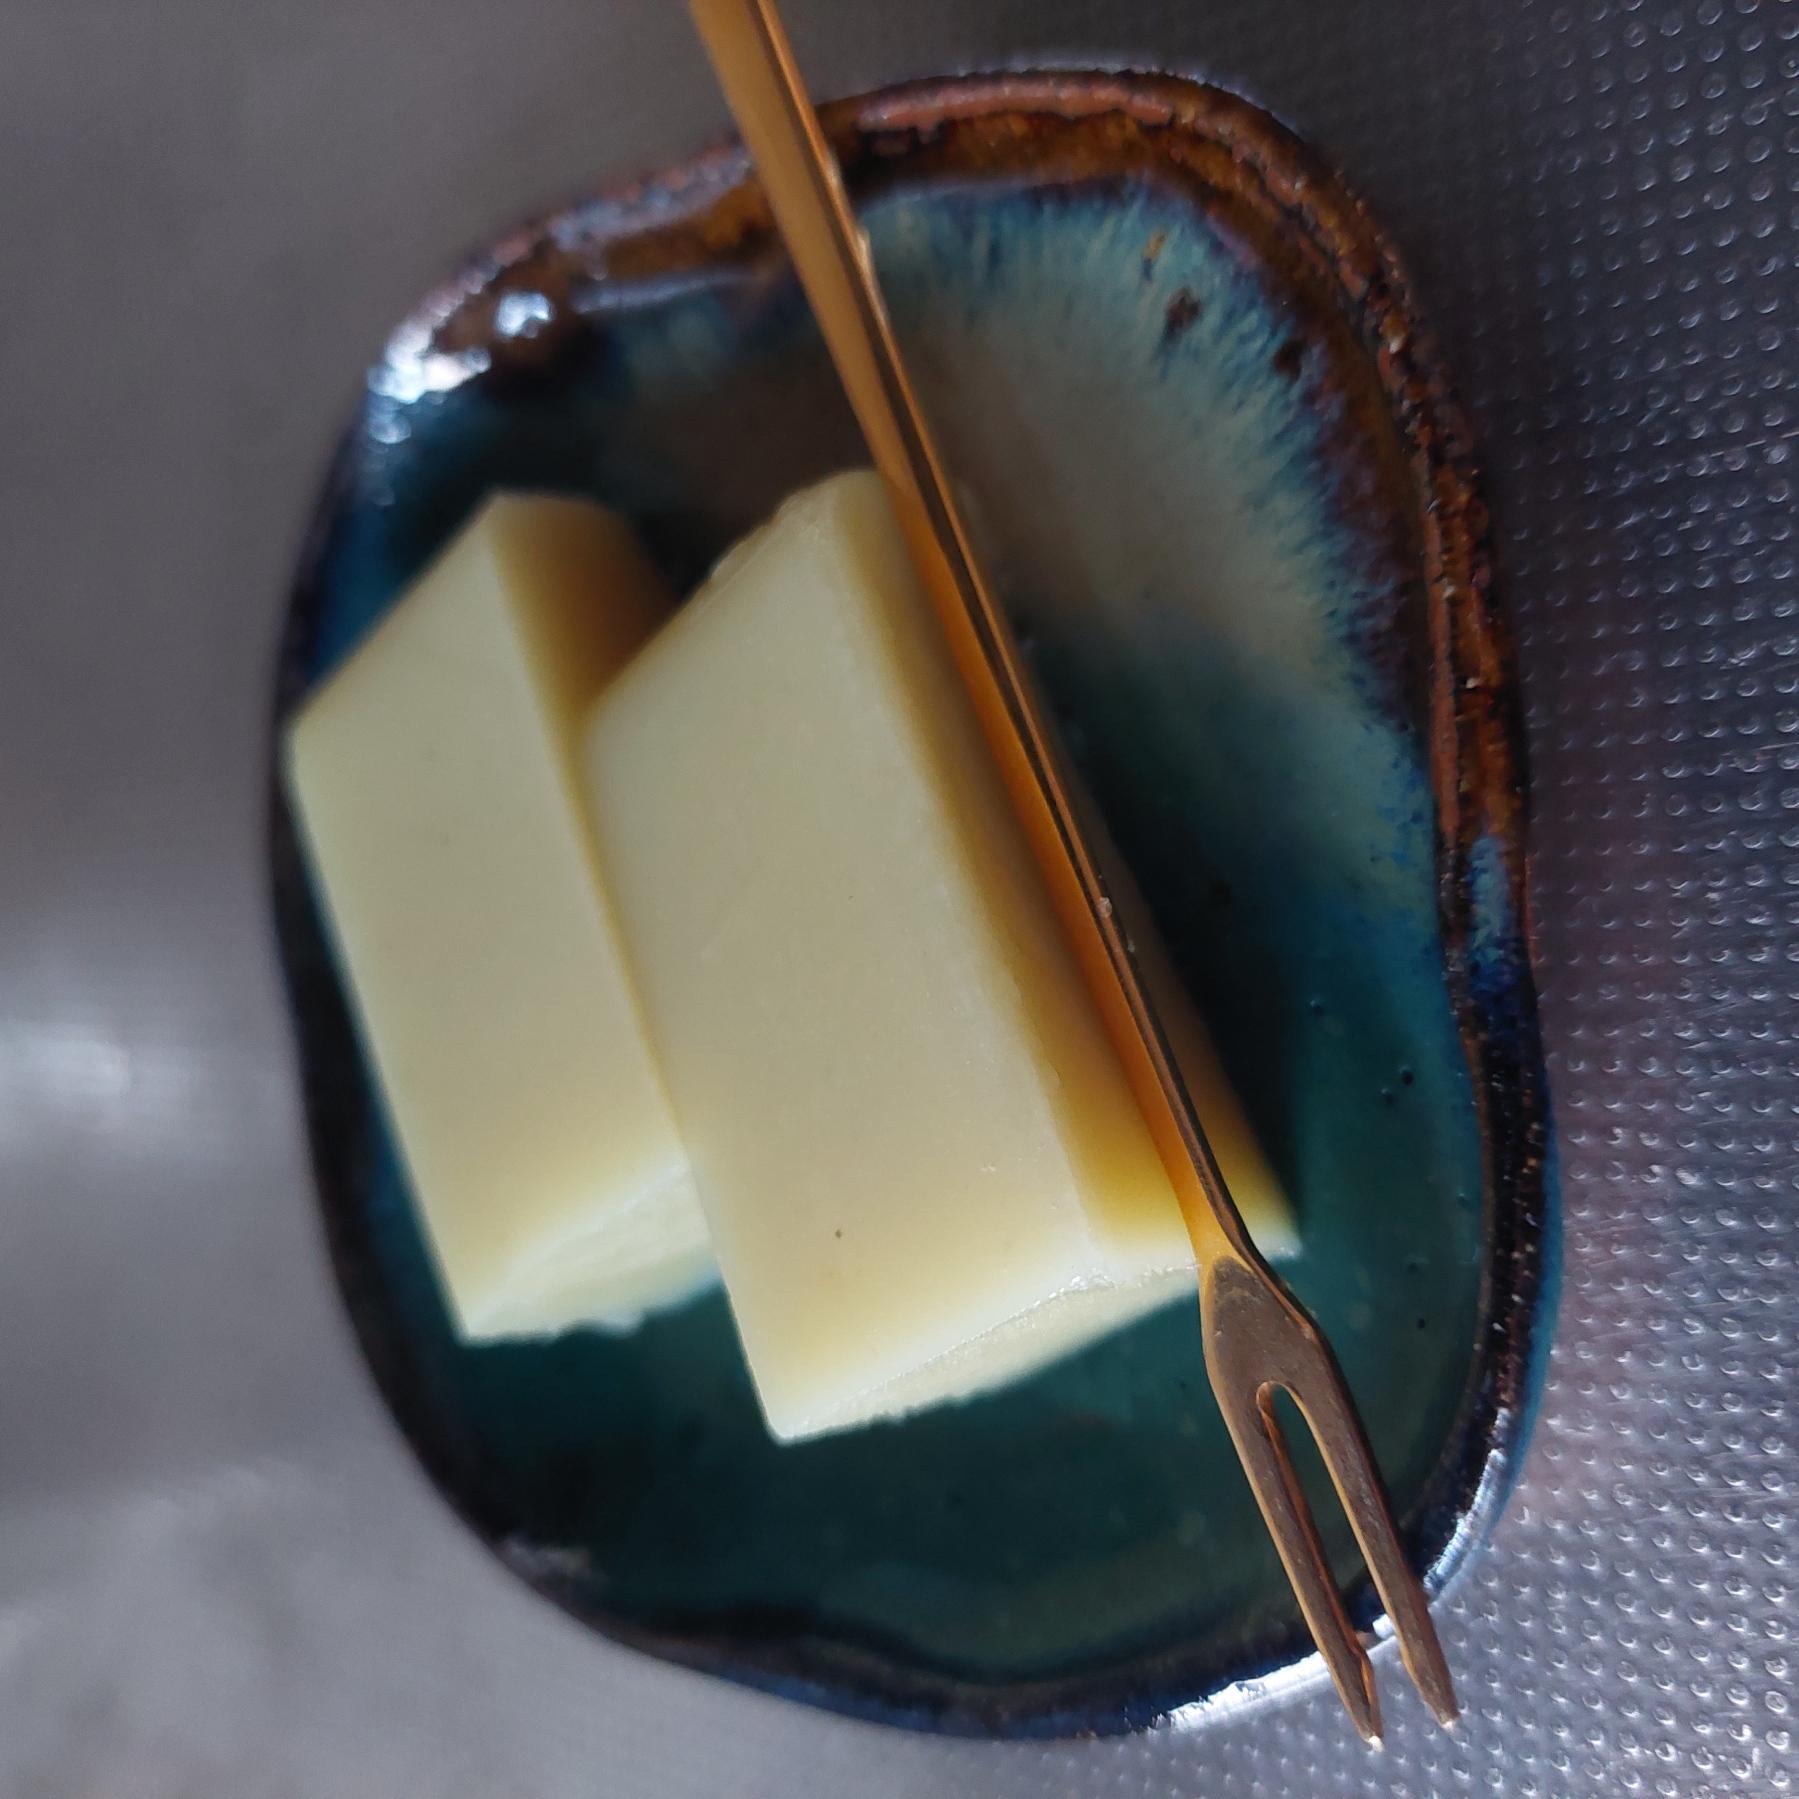
The removed battery. It’s pretty swollen. Because of this, I couldn’t use the touchpad properly.
The recipe for sweet potato yōkan that I often made this fall.
Ingredients
Sweet potato – net 300g
Japanese gelatin liquid – 4g stick Japanese gelatin, 60g soft brown sugar, 300cc water
Method
Clean the Japanese gelatin stick and soak it in water.
Wash the sweet potato thoroughly and wrap it with the skin on for cooking in the microwave. 4 minutes at 600W. Flip and cook for 3 minutes.
Make the Japanese gelatin liquid, while cooking the sweet potato in the microwave. Tear the soaked Japanese gelatin into small pieces and boil over heat. When it comes to a boil, add the sugar, stir to dissolve, and boil for 2 minutes. It seems that it solidifies more easily if it is brought to a full boil.
Break off the stringy parts of the head and tail of the sweet potato. Peel it. Tear it into about 5 pieces, and put them in a mixer.
Remove the Japanese gelatin liquid from the heat and add it to the mixer and mix avoiding lumps left. It seems to be a good idea to stir the mixture with a spoon every now and then.
Transfer from the mixer to a suitable container, smooth its surface, and put it in the refrigerator.
That’s all. After it hardens, warm it quickly with hot water, take it out of the container, cut it, and eat it. It has a simple taste which is affected by the sweetness of the sweet potato.
After a long time, when I checked broken links and fixed them, I got an error about the size of the uploaded file. I haven’t changed the setting in php.ini about file sizes from before. I thought why. At sometime in the past I set them as below, because I wanted to prevent large files uploading from someone.
post_max_size = 8M
upload_max_filesize = 2M
So I built an intra FileZilla server with FTP over TLS, and I used it for my articles’ images.
I haven’t noticed this trouble until now, which tells me that I didn’t do anything other than updating server software after changing to a Windows10 server. 😅
So, at this time, I’m going to build a FileZilla server.
Step2 Install the downloaded program on the server machine. I left the default except for the installation directory.
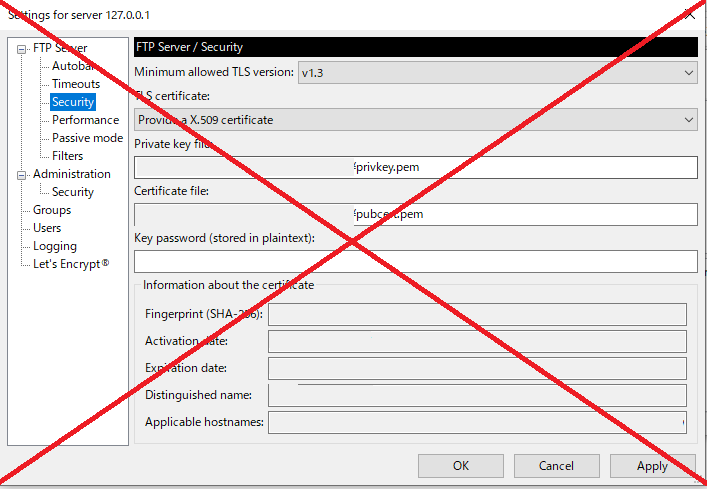
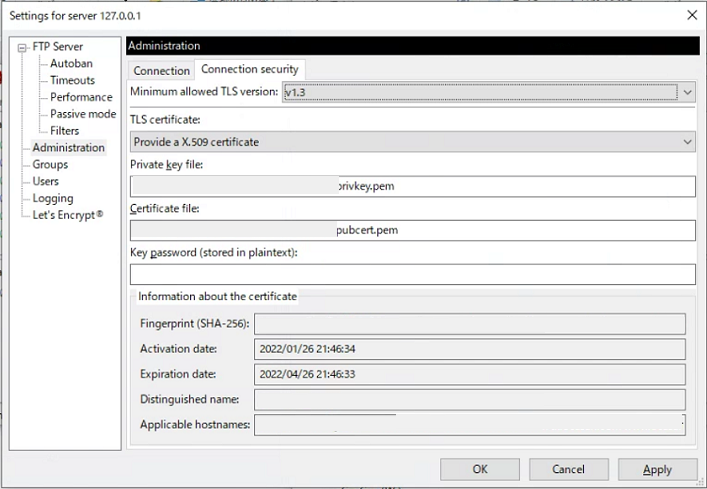
Step3 FTP Server / Security settings.
I am using the Let ’s Encrypt certificates for my web server, so I will also use them for the FTP server. The key.pem and cert.pem are in the md directory of Apache.
FTPS setting for LocalRepositioning of Security tag
Addition: Today (2022.Feb.20), I noticed that FileZilla Server was updated to 1.3.0, and Security Tag location was replaced into Administration area.
Step4 Set users. But only me this time again. I also set a password for accessing as a client.
Step5 AS I need a permission by Windows10 Firewall, I go to “Windows Defender Firewall” >> “Allow apps or functions through Windows Defender Firewall” from Windows10 Control Panel. Now “Allow another app” button isn’t grayout, so click it. By the “Browse”, add filezilla-server.exe of the FileZilla Server folder.
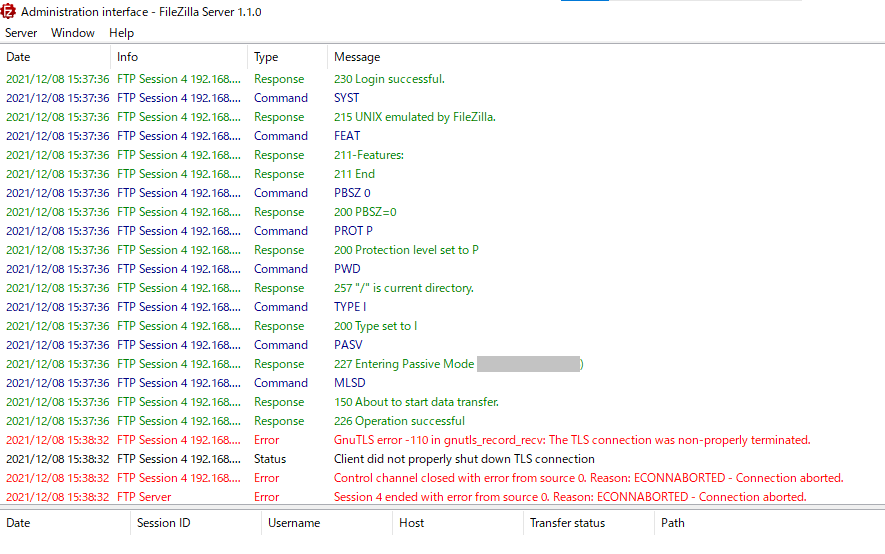
By the way, I got the following errors on the server log, when I disconnected as a user from Client Software.
I mention the four lines of the bottom.
After surffing the Internet, I find out Trac has a comment from Tim Kosse that is ” Completely harmless, safe to ignore if there is no ongoing activity. I’m looking into a way to suppress these messages during periods of no activity.”
My FileZilla Server is on Windows10 Home x64 version 21H1 19043.1348 and version 1.1.0.
The theme is the WordPress official, Twenty Twenty-One, I took. I did “NetWork Enable”. When it isn’t customized, it is very very simple look.
The plugins I put in before preparing the contents are as follows. Akismet is already in. I initially set the following four to “NetWork Enable”, but in the end, I enabled them for each site. Because I decided to merge my old Perl posts to this WordPress.
Access the old MySQL with phpMyAdmin (from a browser’s URL bar) and export 8tables, commentmeta, comments, postmeta, posts, termmeta, terms, term_relationships and term_taxonomy for each site. This is for each site, so 16 tables in this case.
Replace the following two URLs in the exported files.
Replace the following to change the engine from MyISAM to InnoDB.
ENGINE=MyISAM → ENGINE=InnoDB
Replace character set from utf8 to utf8mb4 and collation from default to utf8mb4_unicode_ci. Well, around here, I just wondered if utf8mb4_unicode_ci is good or utf8mb4_unicode_520_ci is good for the Japanese blog.
Access the new database with phpMyAdmin in the server administration tool, drop 16 destination tables, and import the old files I customized earlier.
A work after importing.
Both Japanese and English sites, Go to “Settings” >> “Reading” to set the front page. Go to “Appearance” >> “Menu” and set the imported menu as the primary menu.
I had trouble with the plugin Content Aware Sidebars.
Twenty Twenty-One doesn’t have a default sidebar. Originally I used a theme with a sidebar, so right after I imported the database, the old sidebar I looked there. After all, I decided to display the original sidebar items in the footer, but I had trouble with the work because the interface of Content Aware Sidebars had been very changed.
I forgot about media files.
Upload the saved images etc. to the wp-content/uploads using WebFTP of the server management tool. Nowadays, WordPress default has each date directory for files, but the olders haven’t had such directories, so leave it as it is.
For uploading images on the sites.
I used GD bbPress Attachments before, because bbPress doesn’t have an image attachment function. Now I use again. I customize the two filters in gd-bbpress-attachments/code/class.php as follows so that visitors can use them without registering as a user.
Note that when I downloaded the media files, I pulled them with Internet Explorer. I don’t know why but I couldn’t connect to the directory with the newest FileZilla. Security reason or something? IE I used is a new one on Windows10.
Publishing the sites and setting Redirect permanent for the root .htaccess of the old sites.
By the way, at 『フリー WP』 I can access the wp-content folder only. I cannot use a .htaccess nor HTML meta tag neither. So I announced my moving on each old Perl post. Hehe.
I received a notification email from Netowl on 2021 Sep.2. It said, “the services 『ウェブクロウ』 and 『フリー WP』 will be terminated at noon on 2022 Mar.31.” I was wondering the services would not continue from quite before, because they didn’t update PHP from 7.1.2 to newer.
Well, they say the deadline for accessing my WordPress source files and database is at noon on 2022.9.30. As I have o6asan’s BBS on 『ウェブクロウ』 and my old Perl’s posts on 『フリー WP』, I should do something for fixing them.
I tried a bit of this and that, in the end I decided to use the PHP/MySQL supported plan on 『 スターサーバーフリー』.
Easy installation by the PHP/MySQL supported plan on 『スターサーバーフリー』.
They offer an easy installation of WordPress by the server management tool, so I use it first.
It seems that the easy installation will do what is explained in the URL below. I installed it in the blog directory created under root.
When you access the dashboard, you will have a instruction if you want to hide /blog directory from the site URL, so do it before converting to NetWork.
Also reconfirm the permalink settings at the same time.
So, the URL of new o6asan’s BBS is http://o6asanforum2.starfree.jp/en/. The PHP version becomes 7.4.25 and 8.0.x is also possible, but the free server does not support https this time either.
I think it’s easy to hide the WordPress dedicated directory from the URL, but I’ll just give the following URL for you.
Step1 If you want to hide your WordPress dedicated directory from the URL, confirm the above changes before making it NetWork.
Step2 Access wp-config.php by FTP tool (WebFTP is offered by the server management tools of 『スターサーバーフリー』). Add the following lines to the specified position and save the overwriting.
Step3 Go to “Create A Network” of Tools in the dashboard admin bar. Check the displayed contents and install.
I feIt troublesome of cecking 『スターサーバーフリー』 server settings, so I decide to go with the sub-directories type this time again. Because the previous free service was okay there, so I took easy path. 😅
Step4 Use WebFTP. Edit and save wp-config.php and .htaccess in the root directory as instructed. Follow the login link of the displayed page on the browser, and log in again.
When overwriting, replace the displayed code with the code between # BEGIN WordPress and # END WordPress in .htaccess.
If you make a mistake in this edit, you might get “too many redirects”. In my case, as I had this message and could not access the dashboard after adding another site, I was very confused.
Step5 Add o6asan’s BBS of English.
I forgot to say. Keep both sites private during this work.
Network actibate Akismet.
Activate Akismet plugin on your network from Site Network Management. After that, go to Akismet settings from the plugin settings of each site and enable it. In my case, I have an API key that I have been using for some time, so I used it to activate.
About a week ago, I finally started to renew my sites, which I had been announce “it’s under maintenance” since the end of July, but honestly speaking I did nothing until last week. Now I will start temporary operation as of the end of September, today. 😅😅😅
For the time being, I was able to change from the Sub-directory of Multisite of WordPress, which is the main purpose, to Sub-domain, but there are various leftovers.
After the support for Windows 7 ended in January, I switched to Web server operation on Windows 10. But at that time I moved the whole sites without touching anything in particular, also I’ve stopped my new articles since the beginning of last year.
I would like to write articles about reconstructing my new server, but I cannot promise “when?” because of my real life problems. I would appreciate it if you could wait patiently.
Apache 2.4.37 from Apache Lounge supported TLSv1.3, so I enabled TLSv1.3 on my Web server which runs on Windows7 HP SP1 32-bit. I only changed from SSLProtocol -all +TLSv1.2 to SSLProtocol -all +TLSv1.2 +TLSv1.3. I did nothing about SSLCipherSuite Directive because the SSL_CTX_set_cipher_list page says ‘An empty list is permissible’.
The default value for the this setting is: “TLS_AES_256_GCM_SHA384:TLS_CHACHA20_POLY1305_SHA256:TLS_AES_128_GCM_SHA256”