Update information Edit(Dec.21) Edit2(Dec.25) Edit3(2014.Jun.22)
 Yesterday, I worked very hard. For what? Well, moving to MariaDB5.5 from MySQL on Windows7HP+SP1(x86). Haha.
First, I backed up all the sever data.
Next, I made a maintenance.html like the right, and for maintenance I added the next lines to the head of my .htaccess at the Document Root. The text in it is like the below. (refer to: mod_rewrite, <IfModule>)
ErrorDocument 503 /maintenance.html
RewriteEngine On
RewriteCond %{REQUEST_URI} !=/maintenance.html
RewriteCond %{REMOTE_ADDR} !=IP address for Admin
RewriteRule ^.*$ – [R=503,L]
Header set Retry-After “Wed, 18 Dec 2013 01:00:00 GMT”
On the page, I found “This section should only be used if you need to have one configuration file that works whether or not a specific module is available. In normal operation, directives need not be placed in <IfModule> sections.”. So, I thought I did not need <IfModule> sections.
Then, I announced the server maintenance on my sites and began moving to MariaDB5.5.
I had a clean installation of MariaDB because I wanted to change my sql engine from MyISAM to InnoDB. When I started using MySQL, I made the tables by MyISAM. Recently, I heard about InnoDB merits several times. So I always wanted to move to InnoDB, but I also found someone was in troubles on moving to it on the Internet. Hence I have hesitated to make a move because I can NOT handle them if something wrong happens despite my poor knowledge about the sql.
MariaDB has InnoDB as its default. So I was going to recreate all my tables on this occasion if necessary.
Step1 The uninstallation of MySQL.
- Deactivated all WordPress plugins on my sites.
- Backed all databases up separately from the sever data backup.
- Also exported all contents of my WordPress from the site Dashboard. Because I was going to import all contents by the WordPress Importer if possible. I gave it up as described below, though.
- Stop the service.
Control Panel >> Administrative tools >> Services
Select the MySQL service name and stop.
- Delete the service.
Run a cmd.exe as an Administrator.
> sc delete MySql
- Removed the folders, MySQL and MyDATA (<--- These are MySQL scripts and data on my server).
Step2 The installation of MariaDB.
- Downloaded mariadb-5.5.34-win32.zip from MariaDB.
- Running my eyes overInstalling MariaDB Windows ZIP packages, I went to the page about mysql_install_db.exe.
- Extracted the Zip archive. Made two folders named MariaDB and MyDB on my server ware partition named Drive_SV. Installed all things made by extract to the folder MariaDB.
Run a cmd.exe as an Administrator.
> cd Drive_SV:MariaDBbin
> mysql_install_db.exe –datadir=Drive_SV:MyDB –service=MyDB –password=secret
By this, I was able to set the password for the root user and had a new my.ini in the MyDB.
- Control Panel >> Administrative tools >> Services
Select the MyDB service name and start
If its ‘Startup Type’ is not ‘Automatic’, you should change it to ‘Automatic’.
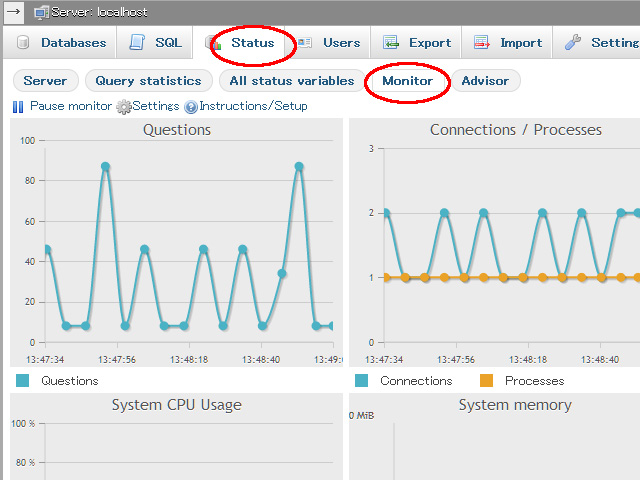
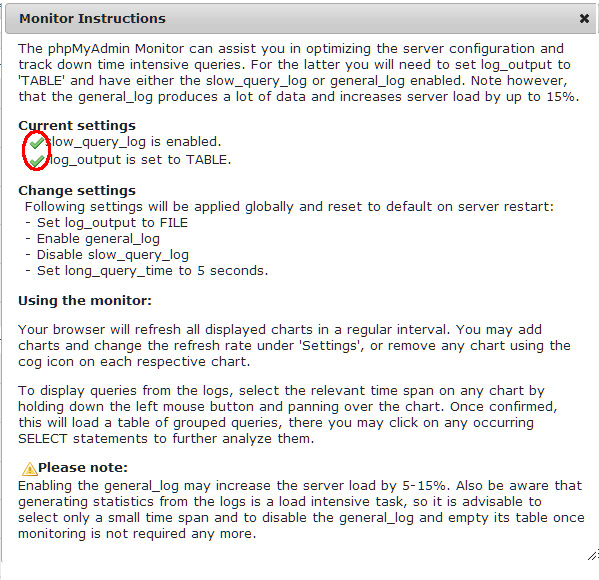
Step3 Access MariaDB via phpMyAdmin.
- Accessed MyDB as the root user from phpMyAdmin.
Imported one of my backup database, phpmyadmin.
- Made a WordPress User and gave it all WordPress database privileges except Grant and no Global privileges. Of course set a password for it. Made a database for the WordPress. Their collation is utf8_general_ci.
Logout.
Import by WordPress Importer and I gave it up. The reason is the below.
After a new WordPress installation, I imported all contents by WordPress Importer. But unfortunately, I found the fact that the plugin neglected some tags like <object>, it was inconvenient for me. I don’t know it neglects what kind tags and to examine them by myself is too much trouble. Therefore, I gave up this method.
Step4 Restored all WordPress database via phpMyAdmin.
- I wanted to use the InnoDB, so I replaced all ‘ENGINE=MyISAM’ by ‘ENGINE=InnoDB’ in the backup sql file.
- Login as the WordPress User.
Exported the current WordPress database.
Dropped all tables on the WordPress table because my backup sql file contained all data.
- Imported the backup. I had an error like this.
#1214 – The used table type doesn’t support FULLTEXT indexes
The backup file was originally MyISAM, so it includes FULLTEXT indexes. Actually it uses by YARPP as keys of post_title and post_content. Hummm. But on the forum the plugin author says we can use YARPP on the InnoDB though its performance slows down.
I removed all lines about FULLTEXT indexes in the file. (I remember I heard we can use FULLTEXT with InnoDB on MySQL5.6.–Dec.25Edit)
- Dropped all tables again.
Imported the customized file. I had another error.
#1064 – You have an error in your SQL syntax;
This error was my fault. When I removed FULLTEXT indexes I forgot to remove a “,” like this.
KEY `post_author` (`post_author`), <<--------This is the ',' I forgot to remove.
) ENGINE=InnoDB DEFAULT CHARSET=utf8 AUTO_INCREMENT=xxxx ;
I removed all such ','s.
- Dropped all tables again.
Imported the customized file. Complete.
Step5 Back to normal condition.
- Login the WordPess.
Activated all plugins.
Checked all script behaviors.
Change .htaccess text to end the maintenance.
- Actually, I still have an error about Jetpack on my parent site. Like this.
Your website needs to be publicly accessible to use Jetpack: site_inaccessible
Error Details: The Jetpack server was unable to communicate with your site https://MySITE
[IXR -32300: transport error: http_request_failed SSL certificate problem: self signed
certificate in certificate chain]
But I think this is not the maintenance faults. Now I am waiting for a reply on the Jetpack forum.
Now I use MariaDB5.5. Clap, clap.
Edit(Dec.21):
After I changed SQL Storage Engine from MyISAM to InnoDB, the plugin YARPP performance slowed down very much. It was more than my expecting. So, I decided to rollback the Engine about the table wp_posts by YARPP instruction message.
- Login phpMyAdmin.
- Select the database for WordPress.
- Select the table wp_posts.
- Select ‘Operations’ from the top navigation bar.
- Change Storage Engine from Innodb to MyISAM at Table options.
- Click Go button of Tabble options.
- Logout phpMyAdmin.
But YARPP didn’t recognize this change, though the author have a specialized feature for this. I went to the YARPP support forum to find a solution. I found MyISAM Override check doesn’t work. I followed hussong‘s instructions.
- Deactivate the plugin.
- Login phpMyAdmin.
- Select the database for WordPress.
- Select the table wp_options.
- Select ‘SQL’ from the top navigation bar.
- Use
SELECT * FROM `wp_options` WHERE option_name LIKE "yarpp%"
Delete all I found.You can see yarpp_fulltext_disabled = 1. Change it to yarpp_fulltext_disabled = 0- Logout phpMyAdmin.
- Activate the plugin.
Setting the plugin again because all old settings gone.
Now, I can use Titles and Bodies consider options. Happy!
Edit2(Dec.25):
I wrote “About Jetpack trouble“.
Edit3(2014.Jun.22):
I wrote an article The solution of “SSL3_READ_BYTES:sslv3 alert handshake failure” on WordPress.