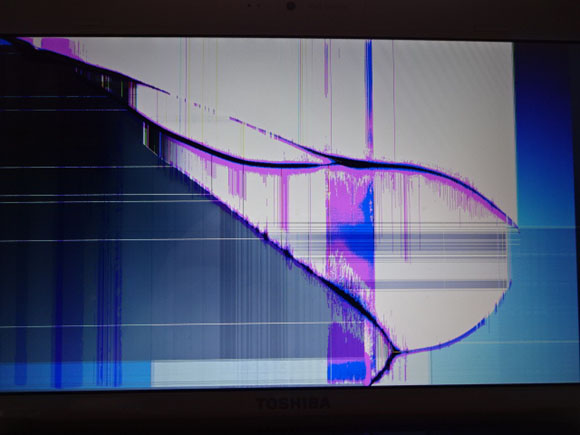
One of my friends gave me a dynabook(N510/04BW) whose display was broken. When she went near dropping and grabbed it, its liquid crystal screen was cracked(Fig 1) and its OS gave an error when it was installed an external display and turned on.
Fig 1 As you know, to replace the screen by the vendor is expensive. This laptop is a little old. So, she decided to use this one like a Desktop PC because her desktop PC is old. She asked me to recover OS and to remove the broken display from the laptop. First, I recovered its OS and found it worked well. So I separated the laptop and removed the broken display.
As I had no confidence about this separation, I had a talk on TODOS・何でも情報交換. りりさん’s comment gave me a charge and she also gave a link though the laptop on the page was very different from N510/04BW. Thanks りりさん.
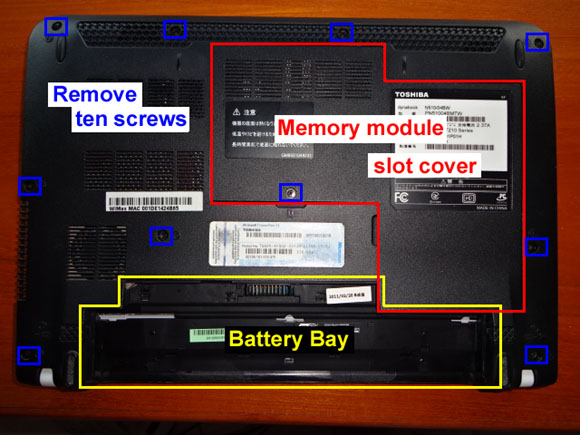
1) Remove the battery pack.
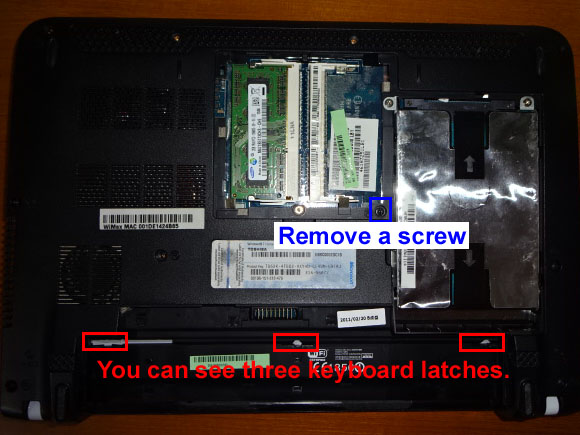
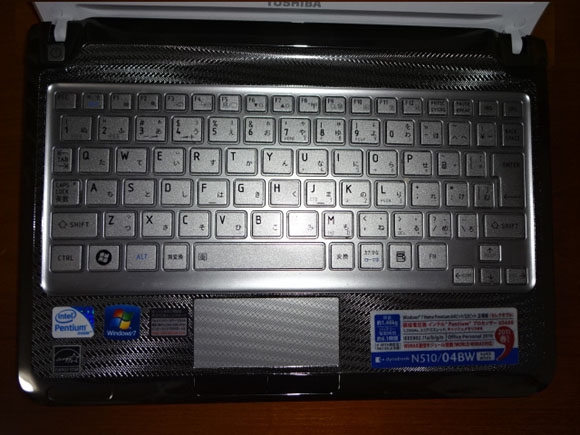
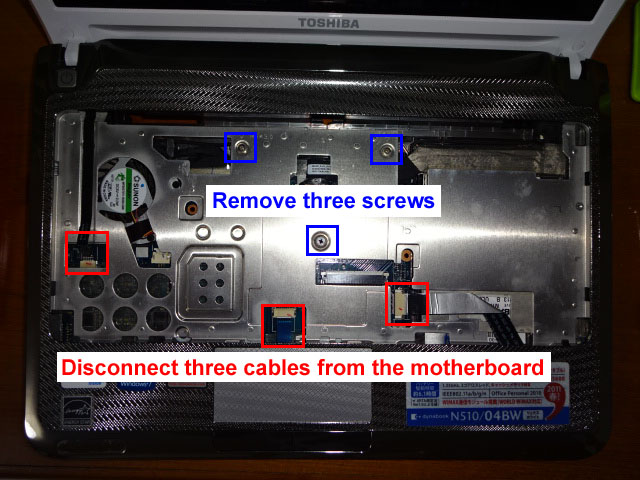
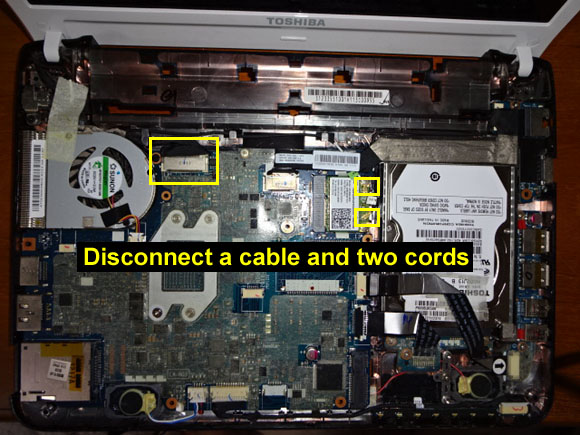
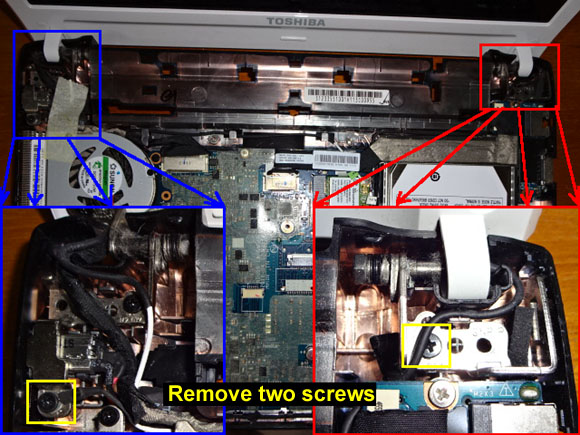
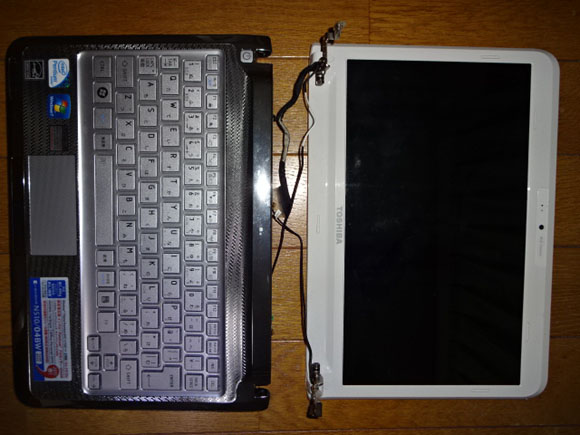
2) Remove 10 screws (Fig 2). Fig 23) Remove Memory module slot cover, and then remove a screw (Fig 3). At the same time, you can see three latches of the keyboard (Fig 3). Unlock these three latches and turn over the laptop.Fig 34) Start removing the keyboard while caring other latches and lift the keyboard to access the ribbon cable which connects the keyboard to the motherboard. Disconnect the cable.Fig 45) Remove three screws, and then disconnect the three cables (Fig 5). Start removing the top cover while caring latches. Fig 56) Disconnect a cable and two cords (Fig 6).Fig 67) Remove two screws (Fig 7). Now you can uninstall the display and so. Actually, you cannot use Webcam anymore, because the camera was included in the display panel together. The friend said she didn’t need it, so I didn’t care about it.Fig 78) Mission complete!!Fig 8
Edit(Sep.25):
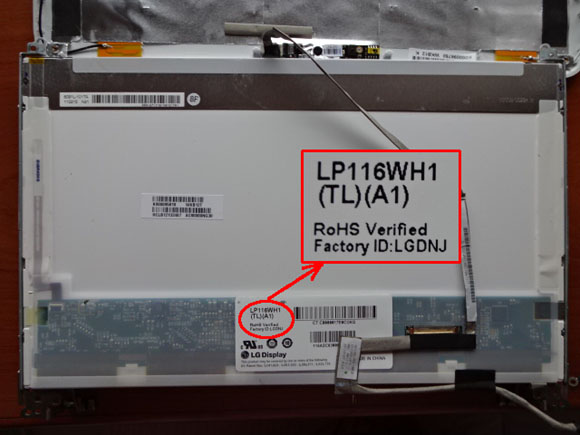
After above, we, りりさん and I, talked about the liquid crystal screen on the BBS, so I checked its model up. The model is LP116WH1 by LG Display and its Suffix is TLA1. What is Display Suffix? If someone knows, please tell me. Anyway, I need to remove the cover of the display for that. I’ll write about these steps.
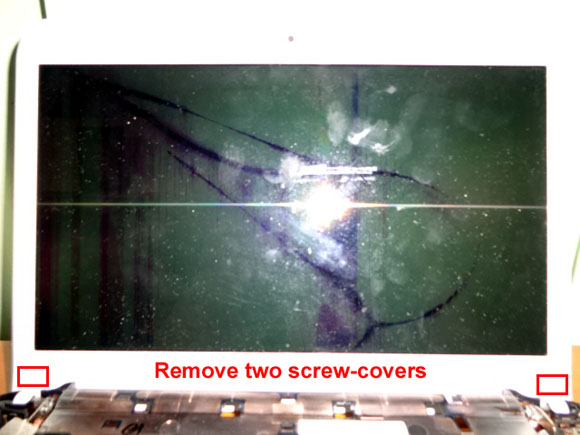
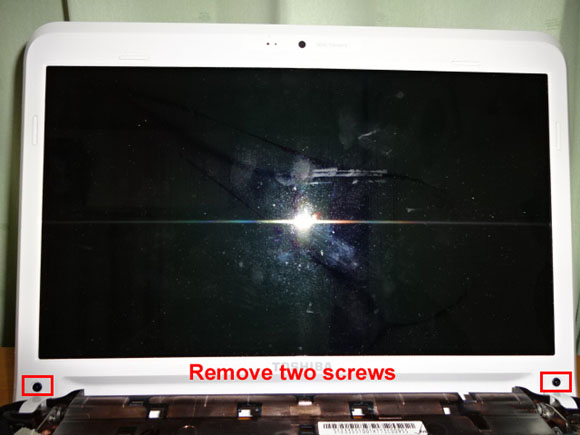
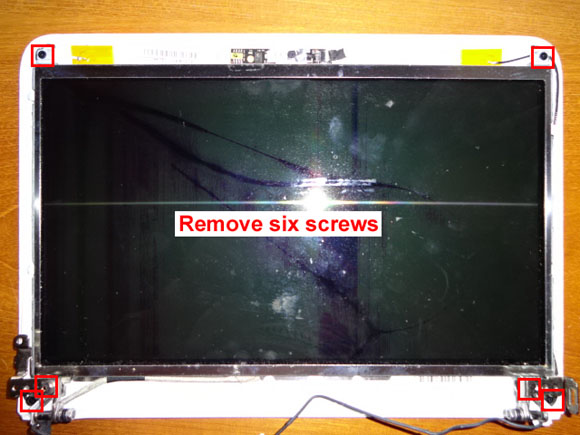
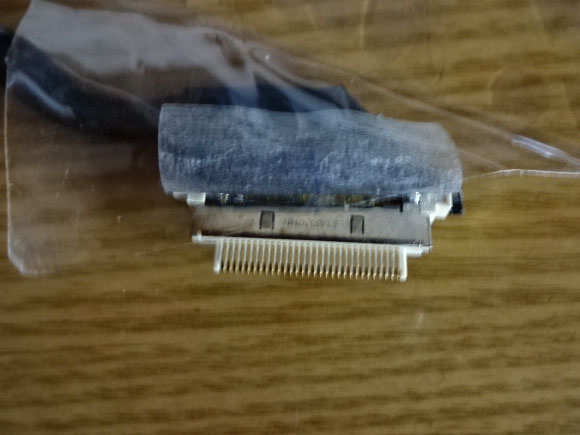
1) Remove two screw-covers(Fig 9).Fig 92) Remove two screws(Fig 10).Fig 103) Start removing the screen cover while caring latches, and then remove six screws(Fig 11).Fig 114) Turn the screen over carefully because the cable still connecting to the screen. But the cable is a little bit slack, so you can turn the screen over without disconnecting(Fig 12). Of course, you should disconnect the cable if replacing the screen. The model is LP116WH1 as you can see.Fig 125) By the way, the width of the cable connecter is about 15mm and it is 30-pin. So, 0.5mm pitch type?Fig 13