Categories
Linux

First VPS #7 : How to use the repository for my own.

同一記事の日本語版

   Last time, I created a repository for my own. This time, I’ll write ‘How to use the repository’.

   Log in a CentOS7 I want to use the repository on, for example the VPS, the VM for development environment, and so on.

  1. Install ‘yum-plugin-priorities’.
    Because Base, Updates and Extras repositories have high priority, CentOS doesn’t use my repository package if the same rpm package exists in these three repositories when they are enabled and aren’t changed their priorities. Of course, you can handle this by manual each time, but I prefer using ‘yum-plugin-priorities’ for my frequently used repositories.
    $ sudo yum install yum-plugin-priorities
     
    I think you have to set their priority for frequently used repositories. How do we know what repositories we enable? You can get the information by the next command.
    $ yum repolist
     
    If you do ‘yum repolist all’, you can get the information about all repositories configured.
  2. Create a myrepo.repo in the directory /etc/yum.repos.d.
    $ sudo vi /etc/yum.repos.d/myrepo.repo
    Its text is the followings.
    [myrepo]
    name=o6asan’s original RPM packages
    baseurl=http://www17130ue.sakura.ne.jp/~myrepo/x86_64/
    gpgcheck=1
    gpgkey=file:///etc/pki/rpm-gpg/RPM-GPG-KEY-o6asan
    priority=1
  3. Add ‘priority=2‘ to the last line of [base], [updates] and [extras] in /etc/yum.repos.d/CentOS-Base.repo.
  4. $ wget http://www17130ue.sakura.ne.jp/~myrepo/x86_64/RPM-GPG-KEY-o6asan
    $ sudo mv RPM-GPG-KEY-o6asan /etc/pki/rpm-gpg/

   Now, I’m ready to use my repository. When I use my repository at the first time, CentOS7 asks about importing RPM-GPG-KEY-o6asan and imports it if I give ‘yes’.

Note) How to delete GPG public key from a client PC.
   The client PC doesn’t have the private key. So ‘gpg --delete-key <email@address>’ gives ‘Unknown system error’. The next command works.
  $ sudo rpm -e [package]

   For that, you need an exact package name. You can get it by the following.
  $ rpm -q gpg-pubkey --qf '%{name}-%{version}-%{release} --> %{summary}n'

   For example, you have the following about CentOS-7 Key.
  gpg-pubkey-f4a80eb5-53a7ff4b –> gpg(CentOS-7 Key (CentOS 7 Official Signing Key) )
   So you can delete it by the next command.
  $ sudo rpm -e gpg-pubkey-f4a80eb5-53a7ff4b

Categories
Linux

First VPS #6 : To create a repository for my own.

同一記事の日本語版

   I want to configure my system with event + suEXEC + FPM on さくらの VPS.
   For that I rebuilt php.rpms with ‘--enable-fpm’, but I got fed up with all the dependency things when I used ‘rpm -ivh’. So I decided to create a repository for my own, ha-ha.

    On the VPS

  1. $ sudo adduser --gid xxxx myrepo
    ‘myrepo’ is a user for the repository and ‘xxxx’ is the gid of the httpd user group.
    $ sudo passwd myrepo
  2. $ sudo chmod 710 /home/myrepo
  3. $ sudo su - myrepo
  4. $ mkdir public_html
  5. $ cd public_html
  6. $ mkdir x86_64
  7. $ exit

   I haven’t written it yet, but I already configure Apache httpd for suEXEC Support. So I have new User and Group on the httpd.conf. If you use the settings on this post for your repository, read my words about httpd configuration on the post as your words on your system.
 
   I removed ‘Options Indexes’ from the httpd conf files, but want to show the indexes of the repository directory. For that I need to use ‘Options Indexes’ in the .htaccess file. So I did the following things.

    About httpd on the VPS

  1. Change the followings about the userdir.conf (/etc/httpd/conf.d/userdir.conf).
    UserDir enabled normuser1 —>> UserDir enabled normuser1 myrepo
        ↑ This is not for .htaccess but for the user ‘myrepo’.
    AllowOverride FileInfo AuthConfig Limit Indexes
    —>> AllowOverride FileInfo AuthConfig Limit Indexes Options=Indexes
  2. $ sudo systemctl restart httpd.service
  3. $ sudo su - myrepo
  4. $ cd public_html/x86_64
  5. $ vi .htaccess
    Its text is ‘Options Indexes’.
  6. $ chmod 640 .htaccess
  7. $ exit
    On the VM for development environment.

  1. Log on as the user ‘rpmbuilder’ and rebuild all the rpm files I want.
     
    Note 1) On the post ‘First VPS #5’, I wrote how to rebuild php.rpm. That’s nothing wrong, but yum gives ‘Package PACKAGE_NAME.rpm is not signed’ when I used my repository. We need a signature for rpm files when we use them by yum though we can avoid it by the option ‘--nogpgcheck’ and I used the option for my filezilla.rpm installation.
  2. Add my signature to the rpm files.
    $ rpm --addsign rpmbuild/RPMS/x86_64/*
     
    Of course, I need GPG Keys before this step.

    • Log on the VM as a root privilege user.
      $ sudo gpg --gen-key
      $ sudo gpg --export -a 'o6asan' > RPM-GPG-KEY-o6asan
      RPM-GPG-KEY-o6asan is my public key file. I upload this to /x86_64 in myrepo’s DocumentRoot on the VPS by Filezilla client.
      $ sudo gpg -o file.secret --export-secret-key o6asan
      file.secret is my private key file. I move this to rpmbuilder’s home directory.
      $ sudo mv /home/vmowner/file.secret /home/rpmbuilder/file.secret
    • Log on the VM as the user ‘rpmbuilder’
      $ gpg --import file.secret
      This command imports both secret and public keys.
       
      $ vi .rpmmacros
      Add the next two lines.
      %_signature gpg
      %_gpg_name <Owner name>
       
      Note 2) Actually, I wanted to create the keys as ‘rpmbuilder’ because I rebuild the rpm files as ‘rpmbuilder’. But I couldn’t. To create GPG Keys requires root privilege.
  3. Upload all the rpm files to /x86_64 in myrepo’s DocumentRoot on the VPS.
  4. On the VPS.
    $ sudo yum install createrepo
    $ sudo createrepo /path to/x86_64

   Now, I have a repository for my own and the URL is http://www17130ue.sakura.ne.jp/~myrepo/x86_64/.
   I’ll write ‘How to use the repository for my own’ for the next post.

Categories
Linux

First VPS #5 : To rebuild php.rpm.

同一記事の日本語版

   My original plan for this post was to write an article about suEXEC Support. I want to configure my system with event + suEXEC + FPM on さくらの VPS. About event + suEXEC on Apache httpd it’s OK by CentOS7 default. But about FPM I found a big problem. The default php.rpm of CentOS 7 seems to have no ‘–enable-fpm‘ option at its build. This information you can have by the following command. For this you need to install the package ‘php-devel’. We cannot get the information by ‘php -i’ when we use CentOS rpms.
$ php-config --configure-options
 
   So I have to rebuild the php.rpm with ‘–enable-fpm’. Is this really necessary? Well, OK (^^;).
   I don’t build rpms on my VPS because I don’t want to install devel packages on the VPS, so I created a virtual PC for development environment in the NJ2100. For the virtual PC I used VMware(R) Player 6.0.4 build-2249910 and CentOS7 (Select ‘Development and Creative Workstation’ and check ‘Development Tools’). See the post “How to create a Virtual PC in Windows7 and run CentOS6.4 on it” for reference.
 
   I almost had the same results except about Ethernet. The NJ2100 has SiS Ethernet Controller and CentOS7 on VMware(R) Player couldn’t find the device out. How can I fix this issue? I found a lot of pages about it on the Internet and I’ll recommend this page for you though it’s Japanese.
 
   They tell me the same thing, i.e. use vmnetcfg.exe and vmnetcfglib.dll. They say that VMware Workstation Free Trial version like VMware-workstation-full-10.0.x-xxxxxxx.exe includes the two files. But there was a problem. We can download VMware Workstation 10 still now if we need a production version, but about Free Trial version we can download VMware Workstation 11 only from the vender site right now. Though I downloaded ‘VMware-workstation-full-11.0.0-2305329.exe’ and took a look in the file, I couldn’t find the two files.
 
   I looked for VMware Workstation 10 on the Internet. FINALLY, I got it from filehorse.com and had the two files. Do you need them? I made a zip for you. Is this act gray or illegal? Anyway I had a VM for development environment.
 
   Now I’ll write to rebuild the php.rpm. All procedures I did on the virtual machine and see the official page for reference.

  1. I make an unprivileged user(rpmbuilder) for building RPMs and and create the user mockbuild which is a no logon user. It seems to be used by the command ‘rpm’ and originated in IUS.
    $ sudo useradd rpmbuilder
    $ sudo passwd rpmbuilder
     
    $ sudo useradd -s /sbin/nologin mockbuild
  2. Create directories for RPM building under rpmbuilder’s home.
    $ sudo su - rpmbuilder
    $ mkdir -p ~/rpmbuild/{BUILD,RPMS,SOURCES,SPECS,SRPMS}
    $ echo '%_topdir %(echo $HOME)/rpmbuild' > ~/.rpmmacros
  3. Download the source rpm from vault.centos.org.
    $ wget http://vault.centos.org/7.0.1406/updates/Source/SPackages/
    php-5.4.16-23.el7_0.3.src.rpm
  4. Install.
    $ rpm -ivh php-5.4.16-23.el7_0.3.src.rpm
  5. Edit php.spec
    $ $ cd ~/rpmbuild/SPECS/
    $ vi php.spec
    Add ‘–enable-fpm ‘ as the line 869.
  6. $ rpmbuild -ba php.spec
     
    It shows packages resolving Dependencies. Install all of them. After that try again.
    $ rpmbuild -ba php.spec
     
    Now I had a php.rpm with ‘–enable-fpm’ option.

   By the way, my VM has GUI, so I wanted to use FileZilla as FTP client software. But I couldn’t find its rpm on the official repositories. Then I made a filezilla.rpm. For this I needed the package wxGTK3-devel, so I installed epel repository.

  1. $ sudo yum install epel-release
  2. $ wget ftp://fr2.rpmfind.net/linux/fedora/linux/development/rawhide/source/
    SRPMS/f/filezilla-3.10.0-1.fc22.src.rpm

    $ rpm -ivh filezilla-3.10.0-1.fc22.src.rpm
    $ cd ~/rpmbuild/SPECS/
    $ rpmbuild -ba filezilla.spec

   That’s it!

Categories
WordPress

First VPS #4 : How to install WordPress on CentOS7.

同一記事の日本語版

   The さくらの VPS trial period ended on December 2nd. But I continue to use because I have some other things I want to challenge. Maybe I’ll pay monthly charge once or more.

   I’ll write “How to install WordPress”. If you do, you must finish First VPS #1, First VPS #2 and First VPS #3 as the prerequisites, of course. First, I install a WordPress as a Wheel Group User (Mine is centos), i.e like a root user.

Note) ||SELinux and WordPress|| (See httpd_selinux(8))

  1. When I used an install feature such as a plugin’s on WordPress, I had “Failed to connect to FTP Server http://VPS_DomainName/”. This seems to occur because Apache Httpd cannot access the network. The solution is “httpd_can_network_connect –> on”.
    $ sudo setsebool -P httpd_can_network_connect on
  2. When I uploaded an image via WordPress, I had “Unable to create directory wp-content/uploads/year/date. Is its parent directory writable by the server?”. At that time, the parent directory permission was 707. This trouble seems to occur because Apache Httpd cannot read/write the directory due to its context. It fixes the trouble to change the context from ‘httpd_user_content_t’ to ‘httpd_sys_rw_content_t’. But, this brought another issue to me. After the change I could not see the directory from my FTP client software.
    If you don’t care about it, you don’t need to do anything else. But, I care. I sometimes back images up via FTP.
     
    I looked for another solution. And I found it out.
    I change the context not to ‘httpd_sys_rw_content_t’ but to ‘public_content_rw_t’. And I also need ‘httpd_anon_write –> on’ for uploading an image via WordPress.
    $ sudo setsebool -P httpd_anon_write on
    $ sudo semanage fcontext -a -t public_content_rw_t
    "/path/to/wp-content/uploads(/.*)?"

    $ sudo /sbin/restorecon -RF /path/to/wp-content/uploads

    Ref URL: 5.6.2. Persistent Changes: semanage fcontext
    This says ‘restorecon -R’ works but I needed ‘restorecon -RF’ to change the type of the directory though I don’t know why.

||How to install WordPress as a Wheel Group User||

  1. Log in phpMyAdmin as root.
  2. Create a database (something like wordpressdb) for WordPress with the collation ‘utf8_general_ci’.
  3. Create a user (something like wordpressuser) for WordPress with localhost and passphrase.
    GRANT USAGE ON *.* TO wordpressuser@localhost IDENTIFIED BY PASSWORD ‘passphrase’;
     
    Edit privileges. Give the user all privileges except grant about the database ‘wordpressdb’. Give no global privileges. This is important.
    GRANT ALL PRIVILEGES ON wordpressdb.* TO wordpressuser@localhost;
  4. Log out.

——————–

  1. Log on the VPS as centos via SSH. After that, you are at /home/centos.
  2. $ mkdir tmp
    $ chmod 707 tmp

    The tmp folder is for download files.

  3. $ cd tmp
     
    Install ‘wget’ if you don’t have it.
    $ sudo yum install wget
     
    Download WordPress and copy to the install folder.
    $ wget https://wordpress.org/latest.tar.gz
    $ tar xzvf latest.tar.gz
    $ rsync -avP ~/tmp/wordpress/ ~/www/html/wp/
  4. Make the uploads folder.
    $ mkdir ~/www/html/wp/wp-content/uploads
    $ chmod 707 uploads
     
    Change the context type.
    $ sudo semanage fcontext -a -t public_content_rw_t
    "/home/centos/www/html/wp/wp-content/uploads(/.*)?"

    $ sudo /sbin/restorecon -RF /home/centos/www/html/wp/wp-content/uploads

——————–

  1. Access http://VPS_DomainName/wp/ by the Web browser.
  2. At the instillation the wp-config.php wasn’t made automatically. So I made it from the installer showing text by an editor and uploaded it to the VPS via FTP. Set the permission of wp-config.php to 404.
    Otherwise, the WordPress installation normally ended.
     
    Note) I couldn’t make the WordPress got the FTP account information automatically, so I added the followings to the wp-config.php before the line /* That’s all, stop editing! Happy blogging. */. They are for correcting the update issues.
    Ref URL: WordPress Upgrade Constants
     
    define('FTP_USER', 'username');
    define('FTP_PASS', 'password');
    define('FTP_HOST', 'VPS_DomainName');

 
   My PHP is running as a DSO (Apache 2.0 Handler). After the configurations above, the environment gives me ‘centos:centos’ as the owner:group about the upgrading WordPress files but it gives ‘apache:apache’ about the media files which were uploaded from Dashboard. So, by FTP client software I cannot modify the media files though I can back them up because of the user ‘centos‘. And I can change the owner:group by ‘chown’ command via SSH.
 
   This matter gives bigger problems when a person use a normal User. Next I’ll write an installation as a normal user.
 
||How to install WordPress as a normal User||
   Of course you cannot do Server-side works as a normal user. It requires your login user has administrative privileges like my centos.

    [Server Side]——

  1. Log on the VPS as centos via SSH. Make a normal user.
    $ sudo adduser normuser1
    $ sudo passwd normuser1
    Changing password for user normuser1.
    New password:
    Retype new password:
    $ sudo chmod 701 /home/normuser1
  2. Edit /etc/httpd/conf.d/userdir.conf.
    $ sudo vi /etc/httpd/conf.d/userdir.conf Ref URL: UserDir Directive

    • Add UserDir enabled normuser1 after the line UserDir disabled
    • Add UserDir www/html after the line #UserDir public_html
    • <Directory "/home/*/public_html">
      —>> <Directory "/home/*/www/html">
    • Options MultiViews Indexes SymLinksIfOwnerMatch IncludesNoExec
      —>> Options MultiViews SymLinksIfOwnerMatch IncludesNoExec
  3. $ su - normuser1
    $ mkdir www
    $ cd www
    $ mkdir html
     
    Check normuser1 id’s property.
    $ id -a normuser1
    uid=1001(normuser1) gid=1001(normuser1) groups=1001(normuser1)
    $ exit
    $ sudo systemctl restart httpd.service
  4. $ sudo gpasswd -a sennari apache
    Check normuser1 id’s property.
    $ id -a normuser1
    uid=1001(normuser1) gid=1001(normuser1) groups=1001(normuser1),48(apache)
  5. Log in phpMyAdmin as root from the Web browser.
     
    Create a database (something like normuser1db) with the collation ‘utf8_general_ci’ for WordPress.
    Create a user (something like normuser1wp) for WordPress with localhost and passphrase.
    GRANT USAGE ON *.* TO normuser1wp@localhost IDENTIFIED BY PASSWORD ‘passphrase’;
     
    Edit privileges. Give the user all privileges except grant about the database ‘normuser1db’. Give no global privileges. This is important.
    GRANT ALL PRIVILEGES ON normuser1db.* TO normuser1wp@localhost;
     
    Logout.
    [Client Side]——

  1. Access normuser1’s DocumentRoot by FTP client software.
    Upload an index.html file as a test. Go and see http://VPS_DomainName/~normuser1/ for a test.
     
    As an aside, I used a base64 encoded in-line image scheme for this index.html (^^).
  2. Create a wp folder in the DocumentRoot by the FTP client software.
    Upload all WordPress files into the wp folder via FTP.
  3. Access http://VPS_DomainName/~normuser1/wp/ by the browser and install WordPress.
     
    At the instillation the wp-config.php wasn’t made automatically. So I made it from the installer showing text by an editor and uploaded it to the VPS via FTP. Set the permission of wp-config.php to 404 .
    Otherwise, the WordPress installation normally ended.
     
    Note) I couldn’t make the WordPress got the FTP account information automatically, so I added the followings to the wp-config.php before the line /* That’s all, stop editing! Happy blogging. */. They are for correcting the update issues.
    Ref URL: WordPress Upgrade Constants
     
    define('FTP_USER', 'username');
    define('FTP_PASS', 'password');
    define('FTP_HOST', 'VPS_DomainName');

   After the steps above, I upgraded WordPress 4.0 to 4.1. It successfully ended. But I could not uploaded media files in spite I had made a uploads folder with its permission 707. So, I did the followings.

  1. By the FTP client software, set the permission of uploads folder to 775 because apache needs full access rights to it.
  2. Next three I did as the user centos via SSH. Normal users cannot do them. I think this is very inconvenient when people run production sites with multiple users because two of these three I could not do until making the uploads folder.
    • $ sudo chown -R normuser1:apache
      /home/normuser1/www/html/wp/wp-content/uploads
    • $ sudo semanage fcontext -a -t public_content_rw_t
      "/home/normuser1/www/html/wp/wp-content/uploads(/.*)?"
    • $ sudo restorecon -RF /home/sennari/www/html/wp/wp-content/uploads

   Now I have a question. Why does WordPress use different methods about upgrades and media uploads? If it use the method of upgrades for media file uploads, the troubles probably do not occur. Though I don’t realize as I don’t know much about PHP, does the same method for both make something wrong?
 
   Anyway, I’ll try suEXEC Support.

Categories
Linux

First VPS #3 : How to configure LAMP on CentOS7.

同一記事の日本語版

   Yesterday, they announced Hayabusa 2 Launch rescheduled again. The new schedule for it is at 13:22:04 on December 3(JST). I hope good weather which makes third time lucky aha.

   I’ll create a LAMP server on CentOS7 with SELinux enforcing in VPS.
   But before this, I did the three four things.

  1. $ sudo vi /etc/pam.d/su
    Then, uncomment the next line.
    #auth required pam_wheel.so use_uid –>> auth required pam_wheel.so use_uid
    Now the OS permits for only the users in Wheel Group can become root by ‘su’ command.
  2. $ sudo vi /etc/aliases
    Then, uncomment the last line of the file and change the user name.
    #root: marc –>> root: centos
    $ sudo newaliases
    By this, the user centos can get root’s mail.
  3. Check up on the time zone.
    $ sudo timedatectl status
    Everything is OK.
    $ sudo systemctl status chronyd.service
    I had “System clock wrong by 1.088336 seconds, adjustment started” in the result, so I edited /etc/chrony.conf.
    $ sudo vi /etc/chrony.conf
    In the file I found “# Use public servers from the pool.ntp.org project.”, and I went to pool.ntp.org. I added the lines with ‘+’ at their head and deleted ‘-’s by the instructions.
    +server 0.pool.ntp.org iburst
    +server 1.pool.ntp.org iburst
    +server 2.pool.ntp.org iburst
    +server 3.pool.ntp.org iburst
    server 0.centos.pool.ntp.org iburst
    server 1.centos.pool.ntp.org iburst
    server 2.centos.pool.ntp.org iburst
    server 3.centos.pool.ntp.org iburst
    Then, restart the service and check again.
    $ sudo systemctl restart chronyd.service
    $ sudo systemctl status chronyd.service
    Now everything is OK.
  4. For automatic updates.
    $ sudo yum install yum-cron
    $ sudo vi /etc/yum/yum-cron.conf
     line# 20: apply_updates = no –>> apply_updates = yes
    $ sudo systemctl start yum-cron.service
    $ sudo systemctl enable yum-cron.service

1 Install Apache Httpd   2 Install MariaDB   3 Install PHP
4 Install phpMyAdmin   5 Install vsftpd

 
||Install Apache Httpd||

  1. $ sudo yum install httpd
    The installed version is httpd.x86_64 2.4.6-18.el7.centos.
  2. Edit /etc/httpd/conf/httpd.conf.
    $ sudo vi /etc/httpd/conf/httpd.conf
     
    Show line numbers by ‘:set nu’.

    • line# 42: Listen 80 –>> Listen Server_global_IP:80
    • line# 86: ServerAdmin root@localhost –>> ServerAdmin My_email_address
    • line# 95: #ServerName www.example.com:80 –>> ServerName VPS_DomainName:80
    • line# 119: DocumentRoot "/var/www/html" –>> DocumentRoot "/home/centos/www/html"
    • line# 124: <Directory "/var/www"> –>> <Directory "/home/centos/www">
    • line# 131: <Directory "/var/www/html"> –>> <Directory "/home/centos/www/html">
    • line# 144: Options Indexes FollowSymLinks –>> Options FollowSymLinks
    • line# 151: AllowOverride None –>> AllowOverride FileInfo Indexes Limit
      In my case, this change is for WordPress use.
    • line# 164: DirectoryIndex index.html –>> DirectoryIndex index.php index.html
  3. Note) The location of exstra.conf files: /etc/httpd/conf.d
    The extra conf files by default: autoindex.conf, userdir.conf, welcome.conf
  4. Note2) The location of module.conf files: /etc/httpd/conf.modules.d/
  5. Note3) I do not rotate log files but the Apache Httpd seems to be able to make it automatically (See /var/log/httpd/ after more than one-day server running). From when can it do this?? Or is this CentOS7’s own feature?
  6. Usually ~userid has the permission 700, but it needs 701 for httpd accessibility. This information on the userdir.conf.
    $ chmod 701 centos
  7. I set the DocumentRoot to an user’s home directory, so I need to tell it to SELinux and to allow httpd to access User Home Directory. This information is on httpd_selinux(8). However, when I tried to read it, CentOS7 said it’s empty, oops!!
    See online httpd_selinux(8).
    $ sudo setsebool -P httpd_enable_homedirs on
    $ sudo systemctl start httpd.service
    I had the error message “Job for httpd.service failed. See ‘systemctl status httpd.service’ and ‘journalctl -xn’ for details.” when I first started httpd.service. Because I forgot to create ‘www’ and ‘html’ directories. So I made them as the user centos.
    [centos@localhost ~]$ mkdir www
    [centos@localhost ~]$ cd www
    [centos@localhost www]$ mkdir html
    Check the directories context.
    $ ls -Z
    drwxrwxr-x. test test unconfined_u:object_r:httpd_user_content_t:s0 www
    $ ls -Z
    drwxrwxr-x. test test unconfined_u:object_r:httpd_user_content_t:s0 html
  8. $ sudo systemctl start httpd.service again.
  9. $ sudo firewall-cmd --permanent --zone=public --add-service=http
    Httpd Testing page
    Httpd Testing page
    $ sudo firewall-cmd --reload
    $ sudo systemctl enable httpd.service
    Note4) Each Well-Known-Port seems to be set by default. So you don’t need firewall-cmd command for port 80.
  10. Access http://VPS_DomainName/. You can see a page like the right image.

||Install MariaDB||

  1. $ sudo yum install mariadb-server mariadb
    The installed version is mariadb.x86_64 1:5.5.40-1.el7_0 & mariadb-server.x86_64 1:5.5.40-1.el7_0.
  2. $ sudo systemctl start mariadb
  3. $ sudo mysql_secure_installation
    Enter current password for root (enter for none): <<-- Hit [Enter] key. Set root password? [Y/n] <<-- Hit [Enter] key. New password: <<-- Type a password for root. Re-enter new password: <<-- Type the password again.   Hit [Enter] key for each question below ⇩. Remove anonymous users? [Y/n]
    Disallow root login remotely? [Y/n]
    Remove test database and access to it? [Y/n]
    Reload privilege tables now? [Y/n]
  4. $ sudo systemctl enable mariadb.service

||Install PHP||

  1. $ sudo yum install php php-mysql php-mbstring
    The installed version is php.x86_64 5.4.16-23.el7_0.3 , php-mbstring.x86_64 5.4.16-23.el7_0.3 & php-mysql.x86_64 5.4.16-23.el7_0.3.
    At the instllation, the php.conf is created in /etc/httpd/conf.d automatically.
  2. Edit /etc/php.ini.
    $ sudo vi /etc/php.ini
     
    Show line numbers by ‘:set nu’.

    • line# 243: output_buffering = 4096 –>> output_buffering = Off
    • line# 314: disable_functions = –>> disable_functions ="shell_exec, suexec, passthru"
    • line# 375: expose_php = On –>> expose_php = Off
    • line# 811: allow_url_fopen = On –>> allow_url_fopen = Off
    • line# 878: ;date.timezone = –>> date.timezone ="Asia/Tokyo"

    Note5) The location of additional.ini files: /etc/php.d
    The additional ini files by default: curl.ini, fileinfo.ini, json.ini, mbstring.ini, mysql.ini, mysqli.ini, pdo.ini, pdo_mysql.ini, pdo_sqlite.ini, phar.ini, sqlite3.ini, zip.ini

  3. $ sudo systemctl restart httpd.service

||Install phpMyAdmin||

  1. I need phpMyAdmin he-he. However I could not find it among the three repositories, base, extras and updates. So, I added ‘epel’.
    $ sudo yum install epel-release
  2. $ sudo yum install phpmyadmin
    The installed version is phpMyAdmin.noarch 4.2.11-1.el7.
    At the instllation, the phpMyAdmin.conf is created in /etc/httpd/conf.d automatically.
  3. Edit /etc/httpd/conf.d/phpMyAdmin.conf
    $ sudo vi /etc/httpd/conf.d/phpMyAdmin.conf

    Here is my phpMyAdmin.conf. See below.
    # phpMyAdmin - Web based MySQL browser written in php
    #
    # Allows only localhost by default
    #
    # But allowing phpMyAdmin to anyone other than localhost should be considered
    # dangerous unless properly secured by SSL

    Alias /phpMyAdmin /usr/share/phpMyAdmin
    Alias /phpmyadmin /usr/share/phpMyAdmin

    <Directory /usr/share/phpMyAdmin/>
       AddDefaultCharset UTF-8

       <IfModule mod_authz_core.c>
         # Apache 2.4
         <RequireAny>
           Require ip my_global_IP
           Require host my_mobile_host
         </RequireAny>
       </IfModule>
    </Directory>

    <Directory /usr/share/phpMyAdmin/setup/>
       <IfModule mod_authz_core.c>
         # Apache 2.4
         <RequireAny>
           Require ip my_global_IP
           Require host my_mobile_host
         </RequireAny>
       </IfModule>
    </Directory>

  4. $ sudo systemctl restart httpd.service

||Install vsftpd||

  1. $ sudo yum install vsftpd
    The installed version is vsftpd.x86_64 3.0.2-9.el7.
  2. Edit /etc/vsftpd/vsftpd.conf.
    $ sudo vi /etc/vsftpd/vsftpd.conf
     
    Show line numbers by ‘:set nu’.

    • line# 12: anonymous_enable=YES –>> anonymous_enable=NO
    • line# 82: #ascii_upload_enable=YES –>> ascii_upload_enable=YES
    • line# 83: #ascii_download_enable=YES –>> ascii_download_enable=YES
    • line# 100: #chroot_local_user=YES –>> chroot_local_user=YES
    • line# 101: #chroot_list_enable=YES –>> chroot_list_enable=YES
    • line# 103: #chroot_list_file=/etc/vsftpd/chroot_list –>> chroot_list_file=/etc/vsftpd/chroot_list
    • line# 128: –>> local_root=www/html
  3. $ sudo setsebool -P ftp_home_dir on
    Because I uncomment local_enable=YES. This information is on the vsftpd.conf.
  4. $ sudo vi /etc/vsftpd/chroot_list
    I added ‘admin’ to the chroot_list.
  5. When I made “chroot_~” uncommented and an access via FTP as a normal user, I had 500 OOPS: vsftpd: refusing to run with writable root inside chroot(), so I added allow_writeable_chroot=YES to the vsftpd.conf. This information I found on 500 OOPS: vsftpd: refusing to run with writable root inside chroot() Login failed on debian.
    line# 104: –>> allow_writeable_chroot=YES
  6. $ sudo systemctl start vsftpd.service
    $ sudo systemctl enable vsftpd.service
    $ sudo firewall-cmd --permanent --zone=public --add-service=ftp
    $ sudo firewall-cmd --reload
Categories
Linux

First VPS #2 : Connecting via SSH.

同一記事の日本語版

   Yesterday morning WordPress 4.0.1 came. They say it is an update for fixing security issues, especially XSS. I encourage you to update to the version immediately if its not updated automatically. When I read “An extremely unlikely hash collision could allow a user’s account to be compromised, that also required that they haven’t logged in since 2008 (I wish I were kidding).”, I laughed despite myself. But I wouldn’t be laughing (Sigh).

   CentOS7 provides SSH feature by default. After changing OS, I connected to the VPS by SSH client named TeraTerm. Of course, you can use other SSH client software, for example, PuTTY, WinSCP, etc. The default SSH server version is 6.4p1-8 now.

   The default setting was less secure because I could connect to the VPS as a root user with root-password. So I changed the settings.

   Before this, I made a public key and a private key by TeraTerm. I set a passphrase to the private key. Of course, I can make the keys on the server, but in such a case I have to have the private key via the Internet. I hate this.

||First, to edit Sudoers File||

  1. Log in VPS Control Panel and click “リモートコンソール”, and then click “VNCコンソールを開く”.
  2. Click “HTML5モードで開く” within 60 seconds. QEMU pop-up in another window.
  3. # usermod -G wheel centos  <— “centos” is one of normal users I add to the Sudoers File.
    # visudo
    The Sudoers File opens.
  4. Search the line includes “wheel” by the command ‘/wheel’.
    If you find “#” at the head of “%wheel ALL=(ALL) ALL”, remove “#”. But I found no “#” with the head, so I had nothing to do.
    Note) How to use visudo is the same as how to use the vim editor.
  5. Quit visudo.
  6. # su - centos
  7. $ sudo shutdown -h now
  8. At the first time you use ‘sudo’, you have the followings.We trust you have received the usual lecture from the local System Administrator. It usually boils down to these three things:


    #1) Respect the privacy of others.
    #2) Think before you type.
    #3) With great power comes great responsibility.

    And it requires your password like this.
    [sudo] password for centos:

  9. You can confirm the server halted at the page “VPS ホーム”. Reboot the server.

||Second, to install the package policycoreutils-python||

  1. Log on QEMU again. Install the package policycoreutils-python because I need the ‘semanage’ command for changing SSH port.
    # yum install policycoreutils-python

||Third, to change SSH settings||

  1. Run TeraTerm (ttermpro.exe). Log in VPS as the user “centos” with password.
  2. Drag&Drop the public key (id_rsa.pub) to TeraTerm Window. TeraTerm has SCP(Secure Copy Protocol) feature. Click “SCP” button.
  3. $ mkdir .ssh
    $ chmod 700 .ssh
    $ cat id_rsa.pub > .ssh/authorized_keys
    $ chmod 600 .ssh/authorized_keys
    $ rm -f id_rsa.pub
  4. $ su -
    Password:  <— Type the root password.
  5. # vi /etc/ssh/sshd_config
    The sshd_config opens.
  6. #Port22  —>  Port****
    #PermitRootLogin yes  —>  PermitRootLogin no
    PasswordAuthentication yes  —>  PasswordAuthentication no
     
    Overwrite and save the sshd_config.

    # systemctl restart sshd.service

    Note) **** is one of the numbers other than well-known ports. But the numbers are 0 – 65535.

  7. # firewall-cmd --permanent --zone=public --add-port=****/tcp
    # firewall-cmd --reload
    # semanage port -a -t ssh_port_t -p tcp ****
  8. # exit
    $ exit
    The connection is terminated.
  9. Run TeraTerm (ttermpro.exe) again. Log in VPS as the user “centos” with key authentication. At the time, use the new SSH port (****) and you need the passphrase of the private key.
  10. I used ‘sudo’ command via SSH.$ sudo firewall-cmd --list-all
    public (default, active)
    interfaces: eth0
    sources:
    services: dhcpv6-client ssh
    ports: ****/tcp
    masquerade: no
    forward-ports:
    icmp-blocks:
    rich rules:

   Mission complete!!

   By the way, I updated my PHP to 5.6.3 on Nov. 15th. ChangLog

Categories
Linux

First VPS #1 : How to install CentOS7.

同一記事の日本語版

   くりくりさん’s comment on the Japanese blog inspired me to use CentOS7 on さくらのVPS. I began to use a free trial for two weeks on 18th.

   Unfortunately, their service is only in Japanese and only for people who live in Japan. But, I think their service is well if you live in Japan. So, I’ll introduce how to register for it.

お申し込み
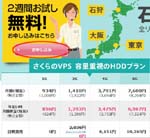
fig.1 お申し込み
||How to register for さくらのVPS||

  1. Go to さくらのVPS and click “お申し込み” (fig.1).
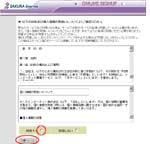
  2. The page “さくら VPS のお申し込み” shows up. Click “利用規約の確認へ” (fig.2).
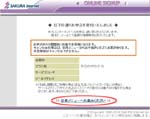
  3. The page “以下の約款及び個人情報の取扱いについてよくご確認ください。” shows up. Print out “基本約款” and “個人情報の取扱いについて” and read them thoroughly. Check the radio button “同意する” and click “つぎへ –>” (fig.3).
  4. The page “お客様の情報をご入力ください” shows up.
    利用規約の確認へ
    fig.2 利用規約の確認へ

    Complete the forms about followings on the page. (*) things are required.

    • メールアドレス(*):  E-mail(*):
    • ご契約者の種別(*):  Type of Contractant(*):
    • ご契約者名(*):  Contractant Name(*):  <--- Last-name-first order.
    • 「約款」&「個人情報の取扱いについて」
      fig.3 「約款」&「個人情報の取扱いについて」
      ご契約者名カナ(*):  Contractant Name カナ(*):
    • 生年月日(*):  Birth Date(*):
    • 性別(*):  Sex(*):
    • 郵便番号(*):  Zip code(*):
    • ご住所(*):  Prefecture(*):
    • 街区名・番地等(*):  Address…(*):
    • 建物名等:  Building:
    • 電話番号(*):(※携帯可)  (Mobile) Phone #(*):
    • FAX番号:  FAX #:

    Click “つぎへ –>”.

  5. The page “会員メニューへログインするためのパスワードを指定してください” shows up.
    • パスワード:  Pasword:
    • 「ひみつ」の質問 :  Secret Question:  <--- Select from the pull-down menu or you can make an original question.
    • 「ひみつ」の答え:  Answer:

    Click “つぎへ –>”.

  6. The page “サービスプラン” shows up.
    • Select さくらのVPS 1G  <--- If you use a free trial for two weeks.
    • Select a residence 石狩/東京/大阪

    Click “つぎへ –>”.

  7. The page “Payment” shows up.
    • Select 毎月払い/年払い  monthly/yearly
    • There are several Payment Methods on the page but you can only use “クレジットカード (Credit Card)” if you use a free trial for two weeks.
    • There are some important notes on the page. Especially, the two written in red are very important.
      ・お申込から2週間後に自動で本登録になります。キャンセルの場合は、お客様にて行っていただく必要がございます。
      ・This temporary registration becomes a formally registration after 2 weeks from your application. If you want the cancellation within the trial period, you have to do it by yourself.
      ・会員メニューから「本登録」をするとキャンセルが行えなくなります。
      ・You can manually change the status of the registration from temporary to formally by your account menu. But if you did it, you lose your right about the cancellation even if your trial period doesn’t end.

    Click “つぎへ –>”.

  8. 以下の通りお申込を受付いたしました
    fig.4 以下の通りお申込を受付いたしました
  9. The page “最終のご確認” shows up.
    This is a confirmation page. Print it out if you need.
  10. The page “以下の通りお申込を受付いたしました” shows up. The page gives you the followings.
    • 会員ID  User ID
    • プラン名  Service Name
    • サービスコード  Service ID
    • メールアドレス  E-mail

    Click “会員メニューへお進みください” (fig.4).

   Now you reach your account page. Logout. The temporary registration completely.

||How to log in VPS Control Panel||

  1. Go to VPSコントロールパネル and log in.
    You can find IPアドレス (IP address) and パスワード (Password) on the email “[さくらのVPS] 仮登録完了のお知らせ”.
  2. パスワード変更  Chage password  <--- This password is for VPSコントロールパネル.

||How to install CentOS7||

  1. The default OS is CentOS6, but I want to use CentOS7. So I installed it from “OS再インストール”.
  2. Go to “OS再インストール” and click “カスタムOSインストールへ”.
  3. Select “CentOS 7 x86_64” from the drop-down menu and click “確認 (confirm)”.
  4. Click “実行 (execute)”.
  5. Click “HTML5モードで開く” within 60 seconds. QEMU pop-up in another window.
  6. About instllation, see CentOS 7.
    While the instillation you need to set up root-password and a normal user.
  7. The instillation might take time. When it has finished, you have the message “Server disconnected…”. Buck to “VPSホーム” and boot the server (仮想サーバ操作:起動). The “ステータス (status)” is changed from “停止” to “稼働中”.
  8. Now I have CentOS7 as VPS OS.

   It was in trouble during the installation that the bottom of QEMU did not appear at all. So I had to handle “Reclaim space” and “Begin Installation” with my intuition and [TAB] and [ENTER] keys. Oops!